
For the pizza-loving newbie, no-knead dough is a game-changer! Here’s why:
Zero dough freak-outs: Forget wrestling with sticky, gluten-packed dough. No kneading means relaxed hands and happy bakers, perfect for building confidence in the kitchen.
Effortless pizza magic: Ditch the fancy techniques and mixers. Just mix, rise, and bake! This easy-going approach lets anyone make restaurant-worthy pizza dough.
Flavorful foundation in a flash: You don’t need hours of kneading for fantastic flavor. The slow, overnight rise in no-knead dough develops rich, complex tastes even while you sleep.
Crispy crust, guaranteed: Even beginners can achieve that airy, bubbly crust thanks to the long fermentation process. Say goodbye to soggy bottoms and hello to pizza perfection.
Time-saving trickery: Skip the kneading, not the feasting! No-knead dough is ideal for busy schedules. Make it ahead, store it in the fridge, and whip up a masterpiece whenever pizza cravings strike.
Minimal mess, maximum fun: Less kneading means less flour dust and sticky surfaces. Keep your kitchen pristine and your focus on what matters most – enjoying delicious homemade pizza!
So, whether you’re a baking-timid newbie or just looking for a simpler way to pizza perfection, no-knead dough is your new best friend. It’s the low-stress, high-reward path to pizza paradise!
No knead pizza dough ingredients:
All Purpose Flour: It’s readily available and affordable, making it an accessible choice for anyone wanting to jump into no-knead pizza making. You don’t need fancy specialty flours to get started.
Water: Forget the fancy water claims, pizzaiolo! You don’t need to fly in NYC’s finest H2O to make a masterpiece. Your trusty tap water does just fine, and hey, if it’s a bit funky, just grab a bottle of your favorite spring water – no sweat! Trust me, the magic is in the ingredients and the love you put into it, not some mystery mineral source. So, fire up that oven, grab your favorite toppings, and get ready to create pizza magic with whatever water tickles your taste buds!
Salt: Listen up, pizza pals! Salt is the secret weapon of any epic pizza. It’s like the fairy godmother who sprinkles a touch of magic on your dough, waking up all the yummy flavors inside. I usually toss in 1.5% of the flour weight in salty goodness, but if you’re chasing that legendary pizzeria taste, feel free to crank it up to 2%! Remember, a pinch more here or there can make a world of difference, so have fun experimenting and finding your own salty sweet spot. Just don’t go overboard, or your pizza might end up saltier than the ocean after a bad hair day! Happy salting, pizza wizards!
Instant Yeast: Unlike active dry yeast, instant yeast is a cool dude, happy to work even in slightly cooler water or dough. This makes it ideal for no-knead recipes, where the dough might not get super warm from mixing.
Optional Sugar: Want your pizza dough to rise like a happy balloon and get that golden, caramelized crust? Well, buckle up, pizzaiolos, because there’s a secret weapon in your pantry! Sugar (in all its forms – granulated, honey, molasses, even maple syrup!) is your buddy here. Just a sprinkle of sweetness feeds the yeast, giving it extra oomph to inflate your dough like a fluffy cloud. And bonus points? That sugar acts like a tanner in the oven, giving your crust a gorgeous, golden glow. So go ahead, add a pinch of sweetness, and watch your pizza come alive with irresistible flavor and color! Just remember, a little goes a long way, so keep it subtle and let the magic of sugar work its wonders.
Pizza dough hydration ratio:
This dough recipe has a 70% hydration ratio, but what does that mean?
It might sound mysterious, but it’s just a fancy way of saying how much water your pizza dough needs. Think of it like a love potion for your flour – the right amount unlocks a world of delicious possibilities!
So, what exactly is this ratio? It’s the percentage of water weight compared to the flour weight. For example, if you use 500 grams of flour and 350 grams of water, your dough has a 70% hydration ratio (350/500 x 100).
But why does this matter? Hydration is kind of like a dial that controls your crust’s personality:
- Low hydration (50-60%): You’ll get a denser, chewier crust, like the classic New York-style pizza. Think firm hold, foldable but with a satisfying bite.
- Medium hydration (65-70%): This is the Goldilocks zone for most home bakers! It gives you a nice balance of chew and airiness, perfect for that Neapolitan-inspired vibe. Think slightly airy, with a good crunch.
- High hydration (75%+): Get ready for the fluffy cloud club! High-hydration doughs are super light and airy, with a thin, crispy crust. Think Roman-style pizza – perfect for showcasing fresh toppings.
Of course, the perfect hydration for you depends on your taste and oven setup. But the best part? Experimenting is half the fun! Start with a medium hydration, feel your dough, and see how it bakes. Then, tweak it up or down, add a smidge of honey for extra browning, and watch your pizza-making skills reach new heights!
Remember, there are no hard and fast rules here – just a delicious quest for your ideal pizza personality. So grab your flour, embrace the hydration ratio, and unleash your inner pizzaiolo!
Hey, all you pizzaholics! Tired of squinting at tiny phone screens to decipher cryptic pizza app percentages? Say goodbye to squinty math and hello to dough-lightful discovery!
Right here on this very blog, I’ve whipped up a whole smorgasbord of pizza dough calculators tailor-made for every crusty craving. From Neapolitan dreams to deep-dish decadence, these bad boys take the guesswork out of gluten goodness.
So ditch the squinting and dive into a world of effortless dough magic! ✨ Check out these calculators, experiment with flavors, and let your inner pizzaiolo sing! And hey, if you find a new crusty combo that rocks your taste buds, don’t be shy! Share it in the comments and let’s get this pizza party started!
Remember, friends, the only bad pizza is the one you never make. Get baking, get creative, and let’s raise a slice (or ten) to dough-licious adventures!

In a 65F kitchen, this dough will take about ten hours to be ready to stretch out. However, if you are impatient for that oven-fresh pizza goodness? We’ve all been there, staring at a seemingly stagnant dough, willing it to rise. But fear not, fellow pizzaiolos, for I bring you a bag of tricks to speed up your dough’s proofing journey!
Warmth is key: Yeast thrives in a cozy environment, preferably between 75°F and 85°F (24°C and 29°C). Crank up your oven to its lowest setting for a few minutes, then turn it off and let the residual heat work its magic. Alternatively, grab your trusty heating pad (set to low!) and nestle your dough-filled bowl on top, covered with a damp towel.
Moisture matters: Dry air is the enemy of a good rise. Trap the humidity near your dough by placing a bowl of hot water inside your proofing chamber (oven or other warm spot). You can also fill a spray bottle with warm water and gently mist the surface of your dough every so often.
Sugar rush! A little extra sugar can give your yeast a burst of energy. Add a teaspoon of honey, molasses, or even plain ol’ sugar to your dough recipe. Remember, though, a little goes a long way – too much sugar can make your dough rise too quickly and lead to an uneven bake.
Bulk Ferment
Time to witness the dough-lightful magic! Once you’ve blended all your pizza-rific ingredients, give that doughy masterpiece some space to strut its stuff. Let it hang out in a warm, cozy spot until it puffs up like a happy balloon, doubling in size like a proud parent showing off twins. This might take an hour or so, but trust me, the wait is worth it for that pillowy-perfect crust. So grab a coffee, put on your favorite tunes, and let the dough do its yeasty thing. Your taste buds will thank you later!
Stretch and fold.
Calling all pizzaiolos with crust dreams of airy perfection! Want your pizza base not just fluffy, but riddled with those delightful little air pockets? Then gather ’round, friends, for the secret of the “Three Stretch & Fold Symphony”!
Step one: let your doughy masterpiece rise to near-doublehood, like a proud parent showing off two bouncing bundles of joy. Now, here’s the magic:
Fold One: Gently grab a corner of the dough and stretch it gently, like coaxing a shy kitten out from under the couch. Fold it over towards the center, almost like tucking it in for a slumber party. Repeat this, stretching and folding from all four corners, until your dough forms a smooth, tight ball.
Rest & Rise: Give your dough a 30-minute breather, like a mini spa break between folds. Let it soak up the love and warmth, and you’ll see it puff up even more, eager for the next round of airiness.
Repeat & Rejoice: Do two more sets of these gentle stretches and folds, spaced 30 minutes apart. With each session, you’ll see those tiny air pockets multiplying like mischievous pizza elves, promising a future of bubbly-edged bliss.
By the time your dough finishes its final rise, it’ll be light, airy, and begging to be stretched out and topped with your favorite pizza dreams. And when you bite into that first crispy-edged, hole-filled slice, you’ll know the Three Stretch & Fold Symphony was worth every minute of doughy dedication.
So get your flour hands ready, pizza pals, and unleash the air pocket magic! Remember, gentle stretching, patient rests, and a touch of love are all it takes to turn your pizza dreams into hole-y reality.
Final rise
Dough ball time, pizza peeps! Now that your dough has risen like a champion, it’s time to divide it into individual masterpieces. Think of them as fluffy, yeasty blank canvases, ready to be painted with your sauce and topping dreams.
For the final rise, I’m a big fan of the “lightly oiled round bowl” technique. It gives your dough balls a cozy nest to snuggle in while they puff up one last time. You can let them rise at room temp for that classic fluffy goodness, or if you’re feeling adventurous, toss them in the fridge for a long, cold ferment (up to 48 hours!). This cold sleep makes the flavors even deeper and the crust extra crispy, like a pizza whisperer’s secret weapon.
So, whether you’re after a quick-and-easy rise or a flavor-bomb cold ferment, choose your path, grab your oiled bowls, and let the final doughy transformation begin! Just remember, patience is key – these little dough spheres are getting ready to turn into your pizza dreams, so let them puff at their own pace. Happy shaping, pizza paladins!
Crank up the heat, pizzaiolos! Once your dough has puffed to perfection, it’s time to prep your fiery oven lair. Set your sights on the highest temperature your trusty oven can muster (mine roars up to 550°F!), like a dragon warming its breath for a delicious pizza feast.
And don’t forget the star of the show – your pizza stone or, in my case, the mighty pizza steel! Give it plenty of time to bask in the oven’s heat, becoming a sizzling canvas for your pizza masterpiece. Think of it as preheating your pizza throne, getting it nice and toasty for the doughy arrival.
Remember, a preheated stone or steel makes all the difference for that heavenly crispy crust. It absorbs the heat like a culinary champion, ensuring your pizza gets that perfect caramelized bottom and bubbly, airy edges. So give it ample time to get scorching hot, and soon, you’ll be witnessing the birth of pizza magic! Happy baking!
While your fiery oven roars into action, transform your dough balls into pizza canvases! Gently stretch them out with your fingertips, like coaxing a shy cloud into a cheerful puff. Don’t worry about perfection – embrace the wobbly, bubbly charm of handmade dough. Think of it as adding personality to your pizza masterpiece.
Once you’ve got a roundish, doughy canvas, nestle it gently on a sheet of parchment paper. This magic helper acts like a loyal pizza-carrying chariot, making the leap from counter to oven smooth and effortless. No floury mishaps, just pure pizza-baking bliss!
So stretch, giggle, and let your inner pizza artist shine! But do not mash the outside edge, this will allow it to puff up. Soon, your doughy creations will be basking in the oven’s heat, ready to be reborn as cheesy, melty masterpieces.

Time to unleash your inner pizza, Picasso! This is where your blank canvas of dough transforms into a masterpiece of melty, cheesy deliciousness. The topping possibilities are as endless as the stars (and probably tastier), so let your imagination run wild!
Sauce first!: Lay down a smooth foundation of your favorite sauce, be it classic tomato, creamy white, or something even wilder. Think fiery chipotle, creamy pesto, or maybe even a sweet barbecue base for a truly unexpected twist.
Cheese symphony: Blanket your saucy canvas with a generous sprinkle of cheese. Mozzarella is the classic maestro, but don’t be afraid to add a chorus of parmesan, ricotta, or even some tangy goat cheese for a taste adventure.
Meat menagerie: Summon your favorite meaty companions! Pepperoni’s always a crowd-pleaser, but sausage, bacon, even grilled chicken or pulled pork can join the party. Feeling adventurous? Throw on some shrimp, caramelized onions, or even roasted veggies for a vegetarian symphony.
Golden glow: Don’t forget the finishing touch! Brush the edges of your dough with a kiss of olive oil for a beautifully golden, crispy crust. It’s like giving your pizza a halo of deliciousness.
Remember, there are no wrong notes in this culinary concerto. So experiment, mix and match, and create a pizza masterpiece that sings to your taste buds! Happy topping, pizza maestros!
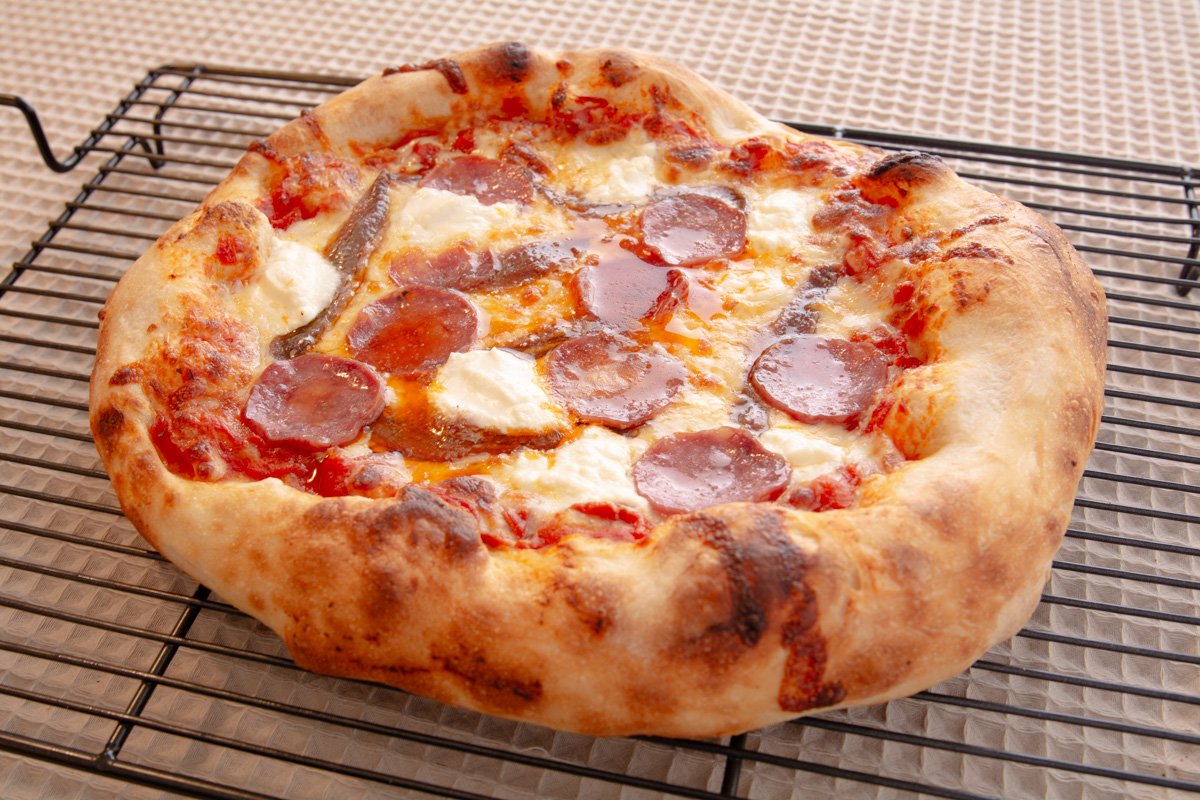
Ah, fellow pizza aficionado, I hear you! Baking on a super-hot pizza steel at 550°F is like unlocking a secret cheat code for pizza perfection. You’re not just talking about regular leopard spots, my friend, you’re talking about achieving those elusive, char-kissed blistered beauties that dance around the edge of your crust.
Here’s why the steel + heat combo is pizza magic:
- Scorching surface: That steel heats up like a dragon’s belly, transferring intense heat directly to your dough. This sears the bottom fast, creating a gloriously crispy, crackly crust with those delightful blistered pockets.
- Moisture control: Steel sucks up moisture like a thirsty sponge, preventing your crust from getting soggy. This translates to a light, airy texture that holds its own under the weight of delicious toppings.
- Heat retention: Steel excels at holding onto heat, ensuring your pizza bakes evenly and quickly. No more soggy centers or pale, undercooked toppings. Just consistent, golden-brown perfection.
Of course, with great power comes great responsibility. Taming the 550°F beast takes a bit of practice:
- Preheating is key: Give your steel ample time to absorb the heat – at least 30 minutes is recommended. Think of it as getting your pizza throne nice and toasty!
- Launch with confidence: Use a peel and parchment paper to transfer your pizza smoothly onto the steel. Speed and a little courage are your friends here.
- Watch like a hawk: High heat means things can get toasty fast. Keep an eye on your pizza, rotating it if needed, to avoid charring instead of charring beautifully.
Remember, practice makes perfect. Once you master the steel + 550°F technique, you’ll be rewarded with pizza that looks like it came straight out of a gourmet pizzeria. Crispy, light, with those coveted leopard spots marking its deliciousness – a true testament to your pizzaiolo prowess. So fire up that oven, let your steel get scorching, and prepare to unleash your inner pizza master!
- Umami magic: Anchovies are loaded with umami, that fifth taste that makes your mouth water and crave more. They play off the natural umami in cheese and tomatoes, creating a symphony of deliciousness on your tongue.
If you have a bread machine you might want to try my bread machine pizza dough recipe. http://jamesstrange.com/bread-machine-pizza-dough-recipe/

I’m so glad you enjoyed the recipe! Sharing it with your friends and pinning it on Pinterest is a fantastic way to support my journey and help others discover delicious pizza-making tips and tricks. Every share and pin truly makes a difference!

Ingredients
- 699 grams All-purpose flour
- 489 grams Water
- 10 grams Salt
- 2 grams Yeast Instant
Instructions
- Combine the dough ingredients.
- Mix to combine until no dry spots are visible.
- Cover and let rise until almost doubled in size.
- Perform 3 sets of stretch and folds, waiting 30 minutes between each one.
- Divide the dough into 4 balls and place into lightly oiled proofing containers
- Cover and let rise until doubled in size.
- Place a pizza stone or Pizza Steel into the oven
- Preheat oven to its highest setting
- Stretch out the dough balls into disks, and place the disks on parchment paper
- Top with your favorite toppings.
- Let rise for 5 minutes.
- Brush the edge of the dough with olive oil.
- Bake in the oven until your desired doneness is achieved
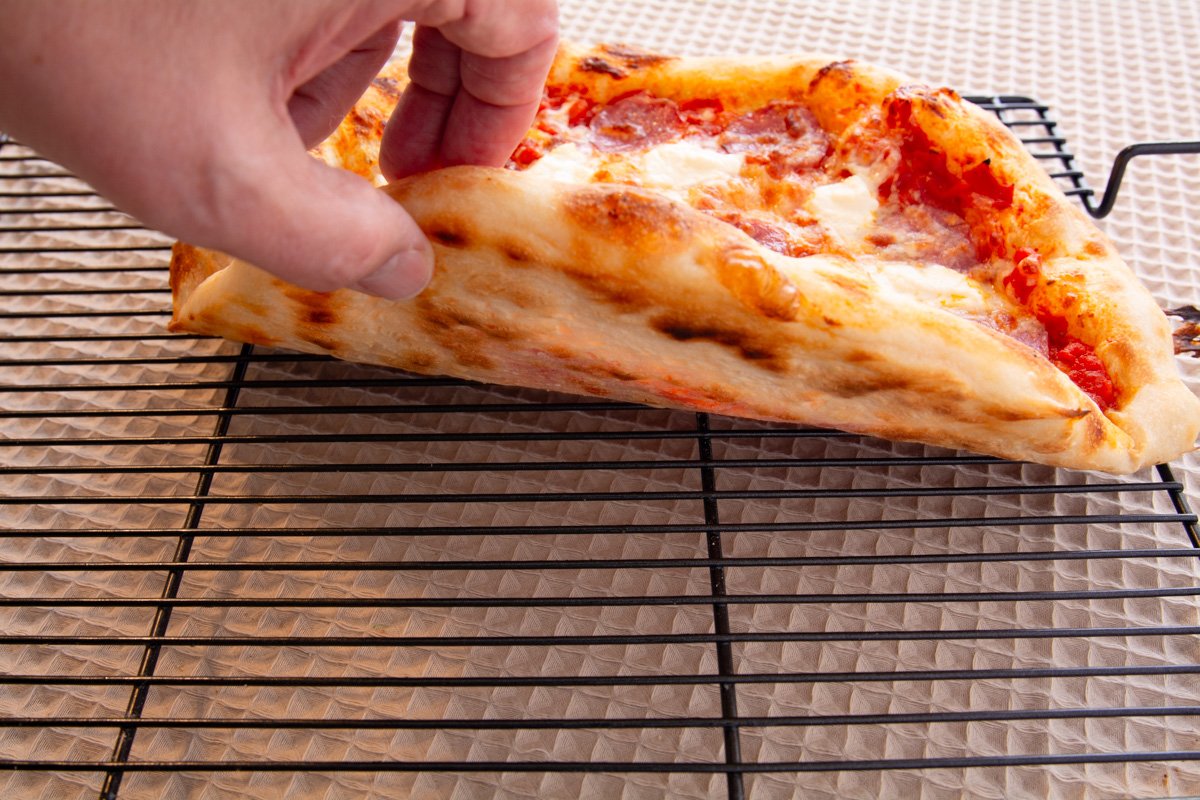
- Remove from the oven and cool on a cooling rack.
Oh my gosh! I’ve now found my go-to pizza dough recipe! It’s perfect – airy, crispy, and delicious! Thank you so much for the recipe!