Hey there, pizzaiolos-in-training! Craving that bubbly, crispy-edged, flavor-explosion pizza that transports you straight to the streets of Naples? Well, move over store-bought dough, because we’re about to embark on a journey to homemade pizza nirvana with the magic of poolish.
What’s a poolish, you ask? Think of it as a slow-fermented starter dough, like a tiny cheerleader for your main pizza dough. It preps the gluten, develops rich flavors, and gives your crust that irresistible airy quality. Don’t worry, though, making a poolish is easier than mastering a Neapolitan hand toss (although that’s next on our list!).
Just a heads up this post does contain affiliate links that earn the site commissions.
Calculate our percentages:
So, you want a crust that’s crispy on the outside, fluffy on the inside, and bursting with flavor? We’re aiming for final dough hydration of 65-70%, perfect for your home oven heat. But here’s the thing: that poolish of yours, your bubbly little dough buddy, needs 100% hydration to work its magic.
Don’t sweat it, though! Even though the poolish is super hydrated, it’s just 30% of the overall dough. Think of it like adding a splash of bubbly water to a big bowl of flour – it won’t drown the whole party.
The rest of the ingredients in your main dough will balance everything out, bringing you to that sweet spot of 65-70% hydration. You’ll get a gorgeous crust that’s both airy and satisfying, thanks to the power of the poolish.
Ah, fellow pizza enthusiast, I hear your cry! Figuring out that perfect dough hydration with a poolish in the mix can feel like trying to solve a Rubik’s Cube after a few slices (we’ve all been there!). But fear not, doughy friend, for help is on the way!
Imagine a magical tool, a poolish dough calculator, that whisks away the mathy mumbo jumbo and leaves you with the perfect recipe for a glorious, bubbly-crusted masterpiece. No more head-scratching over percentages or wrestling with hydration levels.
Link to my pizza dough calculators: https://jamesstrange.com/pizza-dough-calculators/
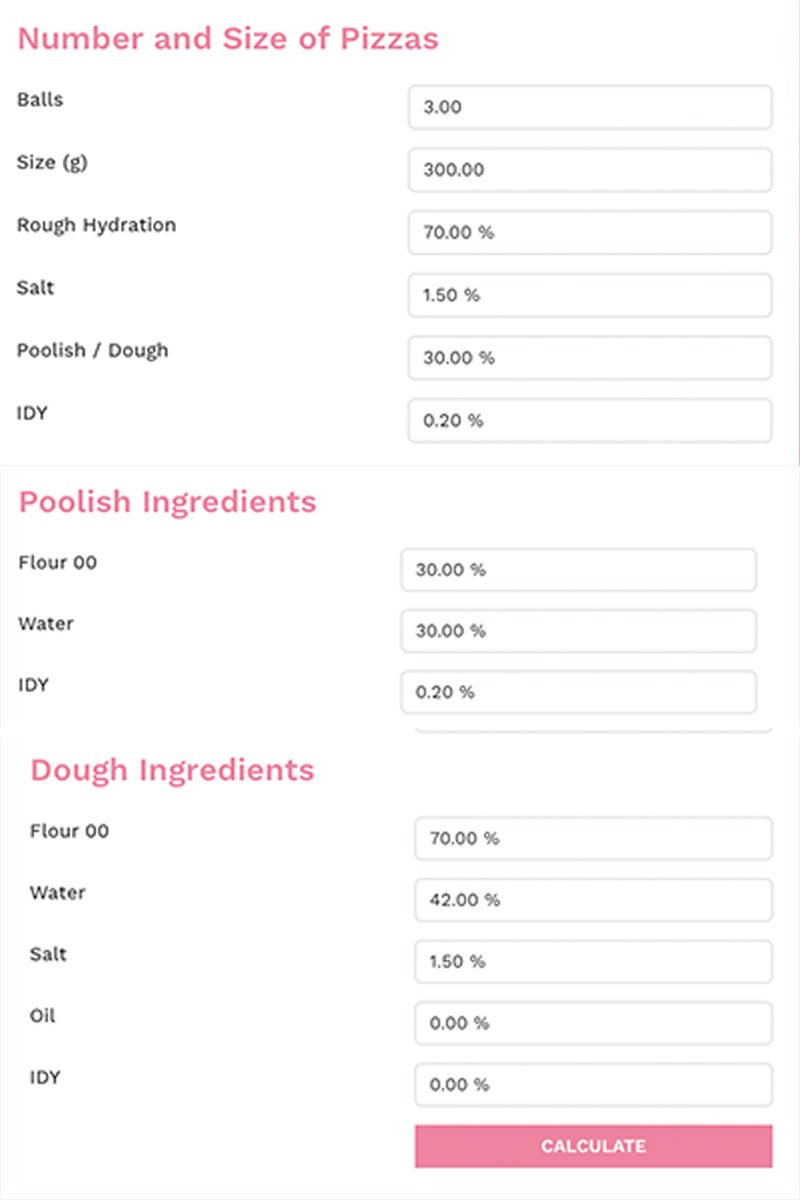
Above is the input that I put into the calculator for my poolish dough. I wanted 3 300-gram dough balls with a hydration of 70%, salt 1.5% (1.5 to 2.5% is good), poolish at 30% (20 to 30% is recommended), and Instant yeast at .2% (.2 to .5 is good).
My poolish is gonna sing its bubbly symphony overnight, right there on my kitchen counter, no fridge dance required. Why? Because magic, that’s why! The simple power of flour, water, and yeast is all you need to awaken those gluten strands and build that gorgeous flavor base.
Sure, some folks add a pinch of sugar or honey to speed things up. But you I will let time and temperature work their natural magic, savoring the slow dance of fermentation. And the result? A deeper, richer flavor that your sugary counterparts can only dream of.
So, let your poolish rest easy on the counter, bask in the warm glow of your kitchen light, and get ready to wake up to doughy nirvana. No regrets, only bubbly, flavorful perfection in every bite.

Above is the recipe that my calculator gave me. I did have to adjust the water in my dough to get the final hydration that I wanted.
Type of flour for pizza:
When it comes to pizza dough, the flour you choose plays a big role in the final texture and flavor. Here’s a breakdown of the differences between all-purpose, bread, and 00 flour:
All-Purpose Flour:
- Protein content: 10-12% (moderate)
- Gluten development: Moderate, creates a chewy but not very airy crust.
- Best for: Thin-crust pizzas or when you’re in a pinch and don’t have other flours on hand.
- Downsides: This can result in a denser crust with fewer air pockets compared to other flours.
Bread Flour:
- Protein content: 12-14% (high)
- Gluten development: Strong, creates a chewier and airier crust than all-purpose.
- Best for: Classic Neapolitan-style pizzas with a thick, airy crust and chewy bite.
- Downsides: Can be difficult to work with due to its strong gluten, and the high protein content might lead to the crust burning more easily.
00 Flour:
- Protein content: 10-12% (similar to all-purpose)
- Gluten development: Weak, creates a light and crispy crust with large air pockets.
- Best for: Roman-style pizzas with a very thin and crispy crust.
- Downsides: Requires careful handling due to its weak gluten, and might not be ideal for thicker crust styles.
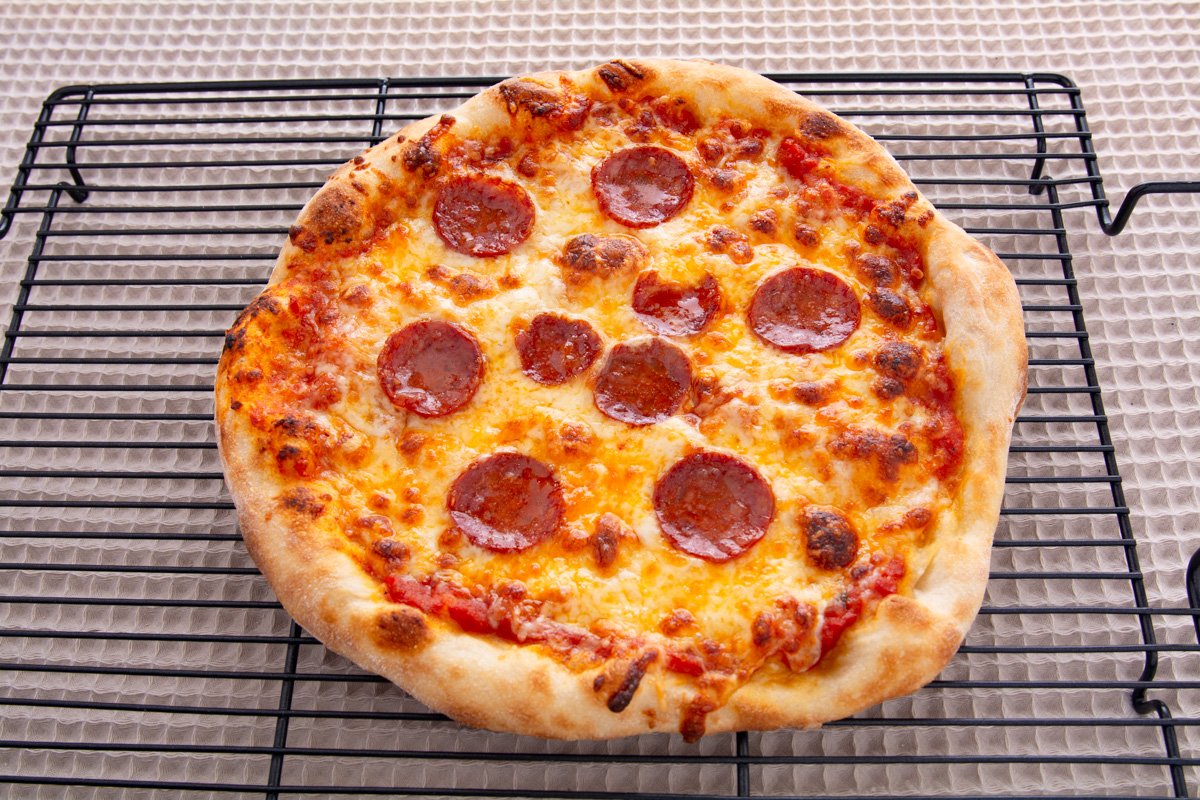
I made this pizza with all-purpose flour just to show that it does work and you do not have to use expensive flour to make good pizza.
Ultimately, the most important thing is to have fun and enjoy the process of creating your own pizza masterpieces. Whether you stick with all-purpose or venture into the world of bread and 00, the key is to find what works best for you and your taste buds. So keep experimenting, keep sharing your successes, and inspire others to explore the wonderful world of homemade pizza!
How to make the poolish:
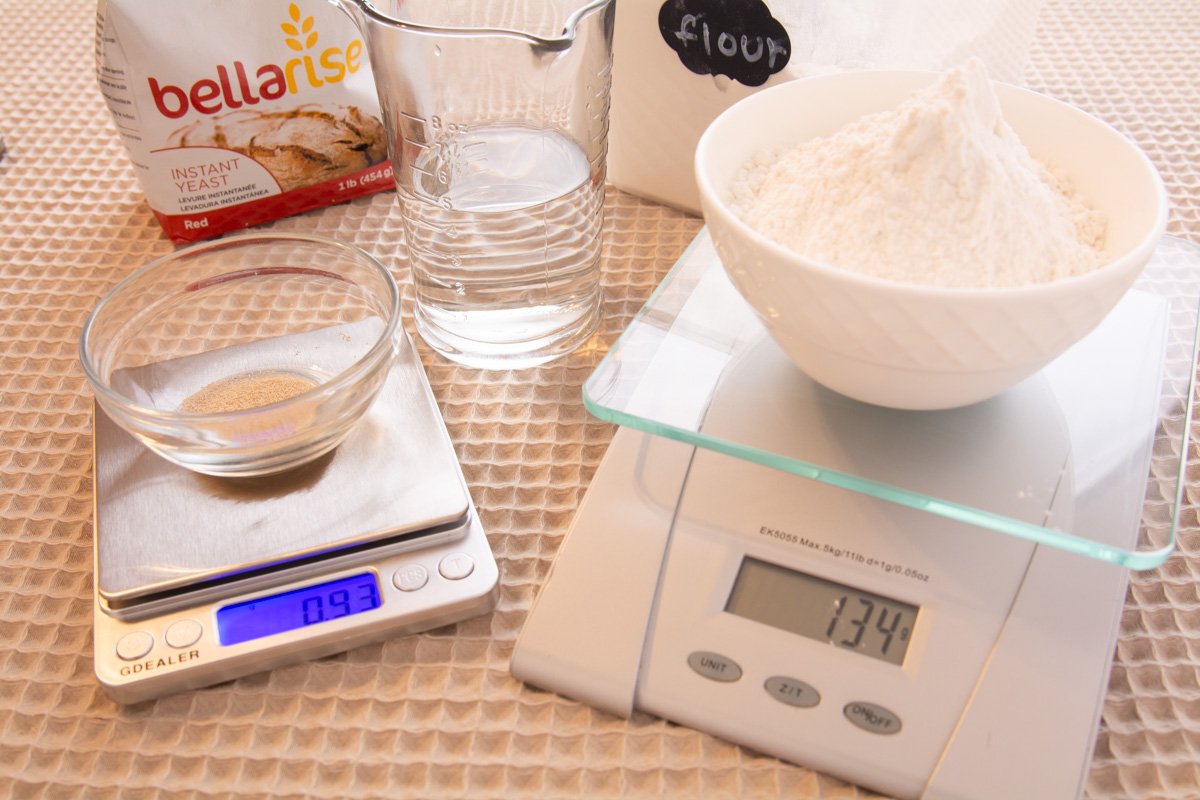
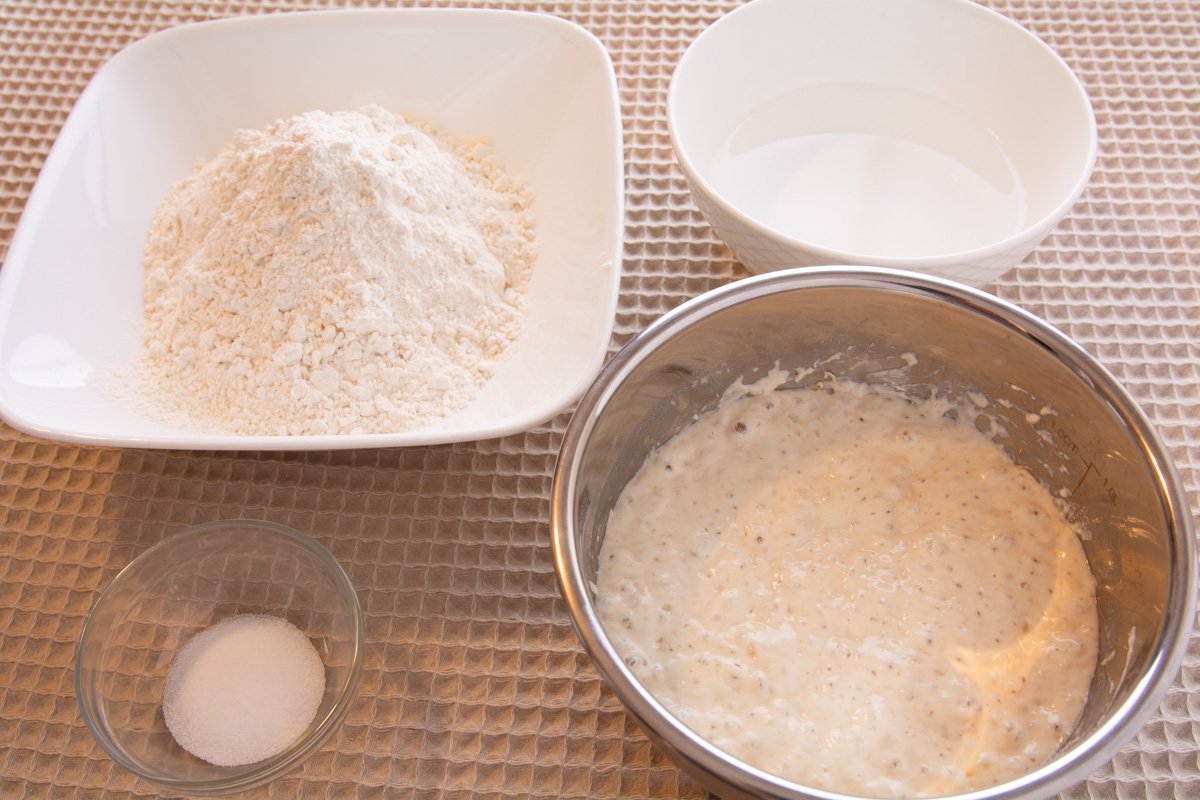
Just like a master artist mixes their paints, consistent results in the kitchen come down to measuring with love (and the right tools!). Your food scale is your trusty sidekick for flour, water, and salt – the backbone of any great dough. But when it comes to that pinch of instant yeast, the magic ingredient that’ll wake up your doughy creation, you pull out the big guns – the precision digital scale. Makes sense! A tiny bit too much of that yeasty goodness can send your dough on a wild ride, while a sprinkle too shy might leave it snoozing.
Now that we’ve got our ingredients prepped and ready, it’s time to whip up this magical poolish! It’s like setting a tiny pizza dough alarm clock for flavor-town, and trust me, it’s easier than making your bed after a particularly epic pizza party (we’ve all been there).
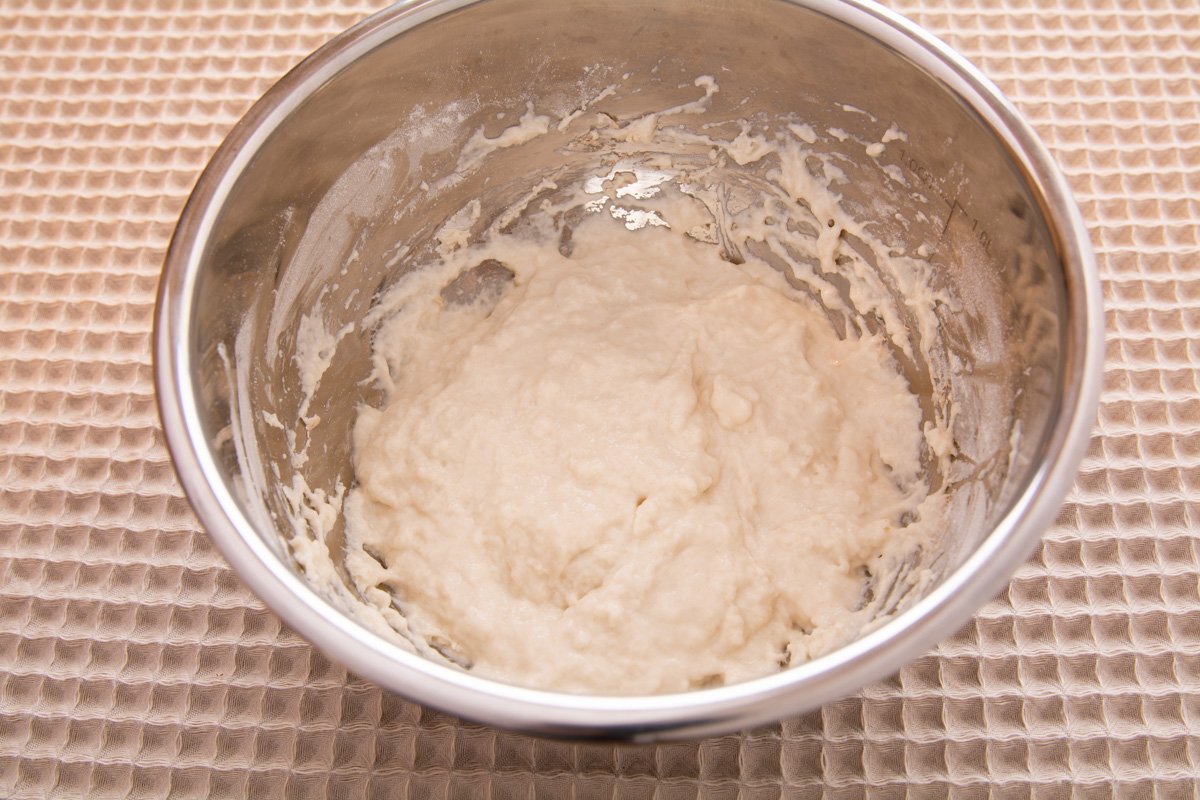
Just chuck those weighed-out water and flour into a bowl, sprinkle in the yeast like it’s tiny pizza fairy dust, and give it a quick stir. Think of it as a gentle tickle to wake up the gluten gremlins. Then, like tucking in a sleepy kitten, pop a lid on that bowl and let it snooze on your counter for the night. In the morning, you’ll wake up to a bubbly, fragrant miracle that’ll take your pizza dough to the next level. No fancy equipment, no complicated steps – just pure doughy magic.

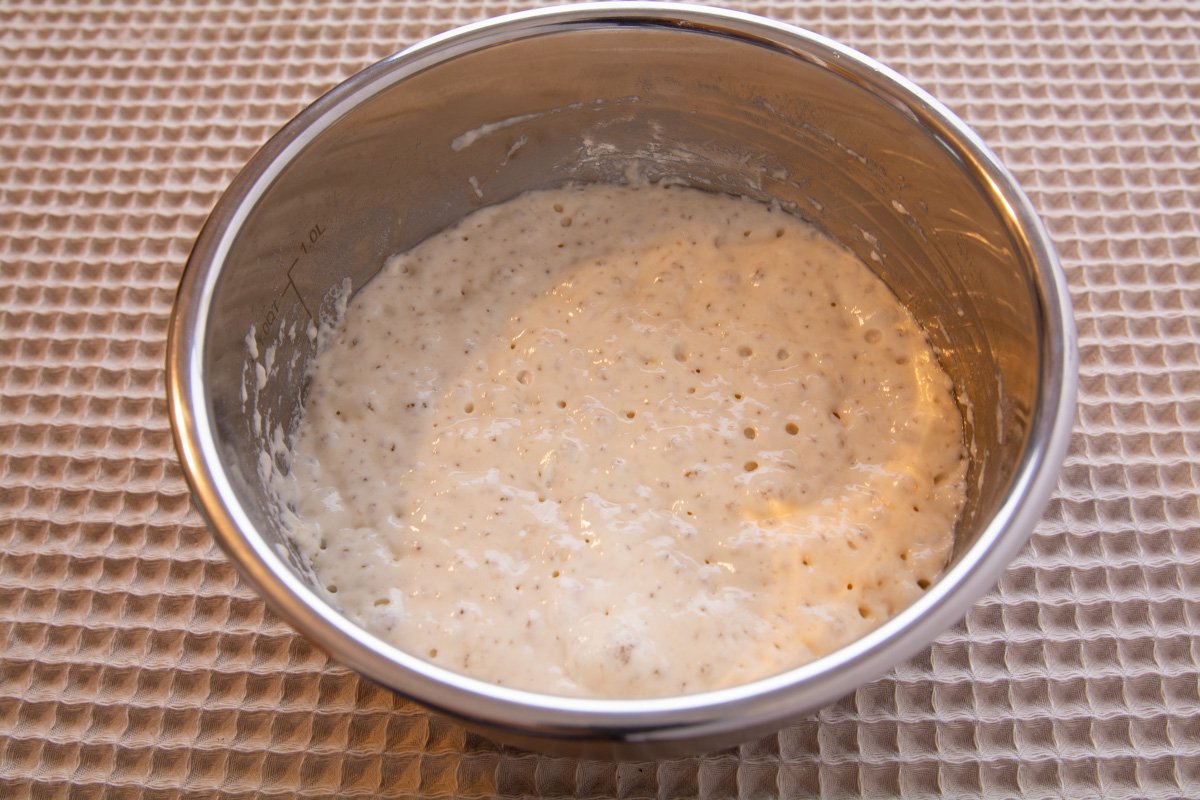
Remember that little dough alarm clock we set last night? Well, it just went off, and it smells like pure pizza perfection. Those tiny air pockets aren’t just bubbles, they’re promises of a light, airy crust that’ll make your taste buds do a jig. And that yeasty tang? Don’t worry, it’s just the dough whispering sweet nothings about the flavor bomb it’s about to become.
Onward doughy dragonslayers! We’ve tamed the poolish beast, now it’s time to gather the rest of our pizza plunder! Think of it like prepping your epic quest kit: flour to craft the mighty crust, water to quench the beast within, salt to awaken the taste buds, and a sprinkle of yeast to give it all a magical rise. No need for fancy maps or enchanted cauldrons, just good ol’ digital scales. So grab your kitchen tools, let your inner pizza warrior loose, and get ready to assemble the ingredients that will soon become a cheesy, bubbly legend! Remember, precision is key – think of each scoop as a brushstroke painting your pizza masterpiece. And hey, if a little extra flour ends up on your nose, that’s just the battle confetti of a true pizza champion!
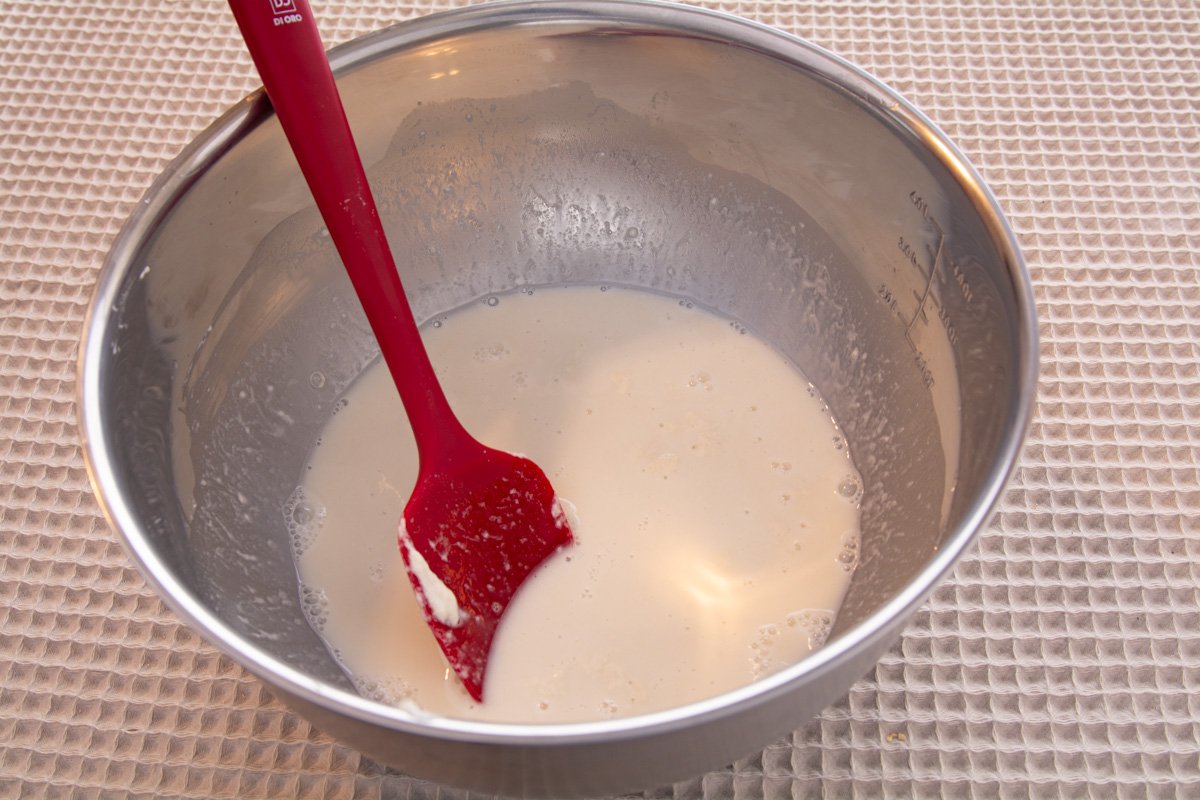
Alright, dough adventurers, let’s gather our forces! First stop, the bigger bowl – pour in that bubbly poolish we coaxed to life, along with the cool, refreshing water. Now, before the flour flies like confetti, grab your trusty mixing implement (wooden spoon, spatula, whisk – you choose!) and give that poolish a good stir. Think of it as waking up the sleepy gluten gremlins and getting them ready for the floury battle ahead. Trust me, it’s much easier to break up the poolish now than wrestling with doughy clumps later. Plus, who wants to fight a sticky, rebellious dough when you can have a smooth, bubbly one instead? So mix away, my friend, and prepare for the epic flour encounter to come!
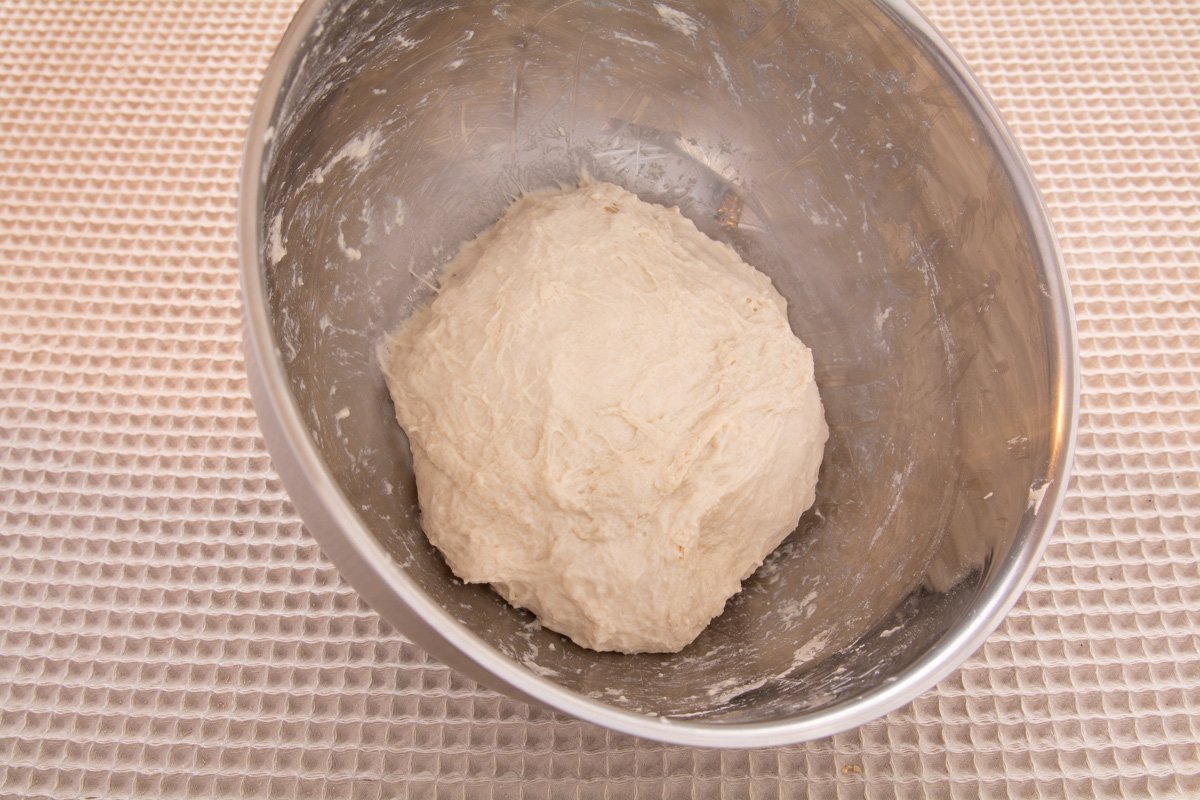
Now that we’ve wrangled all the ingredients into a cozy bowl, it’s time for a little patience play. Cover that doughy masterpiece like a sleeping dragon and let it snooze for half an hour. This is where the gluten gremlins do their magic, stretching and flexing, building the strength for that beautiful Neapolitan crust.
After thirty minutes, wake up the dragon with a gentle stretch and fold. Think of it as a tiny pep talk for your dough. Just fold the edges towards the center like a shy pizzaiolo welcoming the warmth of a wood-fired oven. Then, tuck the seam underneath like a comfy blanket and give it another cozy cover.
Now comes the fun part – the waiting game! Watch as your doughy dragon puffs up, doubling in size and bubbling with excitement. Soon, it’ll be ready to stretch, shape, and transform into the pizza canvas of your dreams. So grab your favorite tunes, pour yourself a glass of vino (if the mood strikes!), and watch the magic of fermentation unfold. Remember, good things come to those who wait
We all know that winter can be a bit of a downer for our pizza-making pals. Those chilled temps can slow down the rise like a snail caught in molasses. But fear not, fellow pizzaiolos, for we have cunning tricks up our floury sleeves!
If you’re feeling impatient on a chilly day, here are a couple of ways to give your dough a little warmth boost:
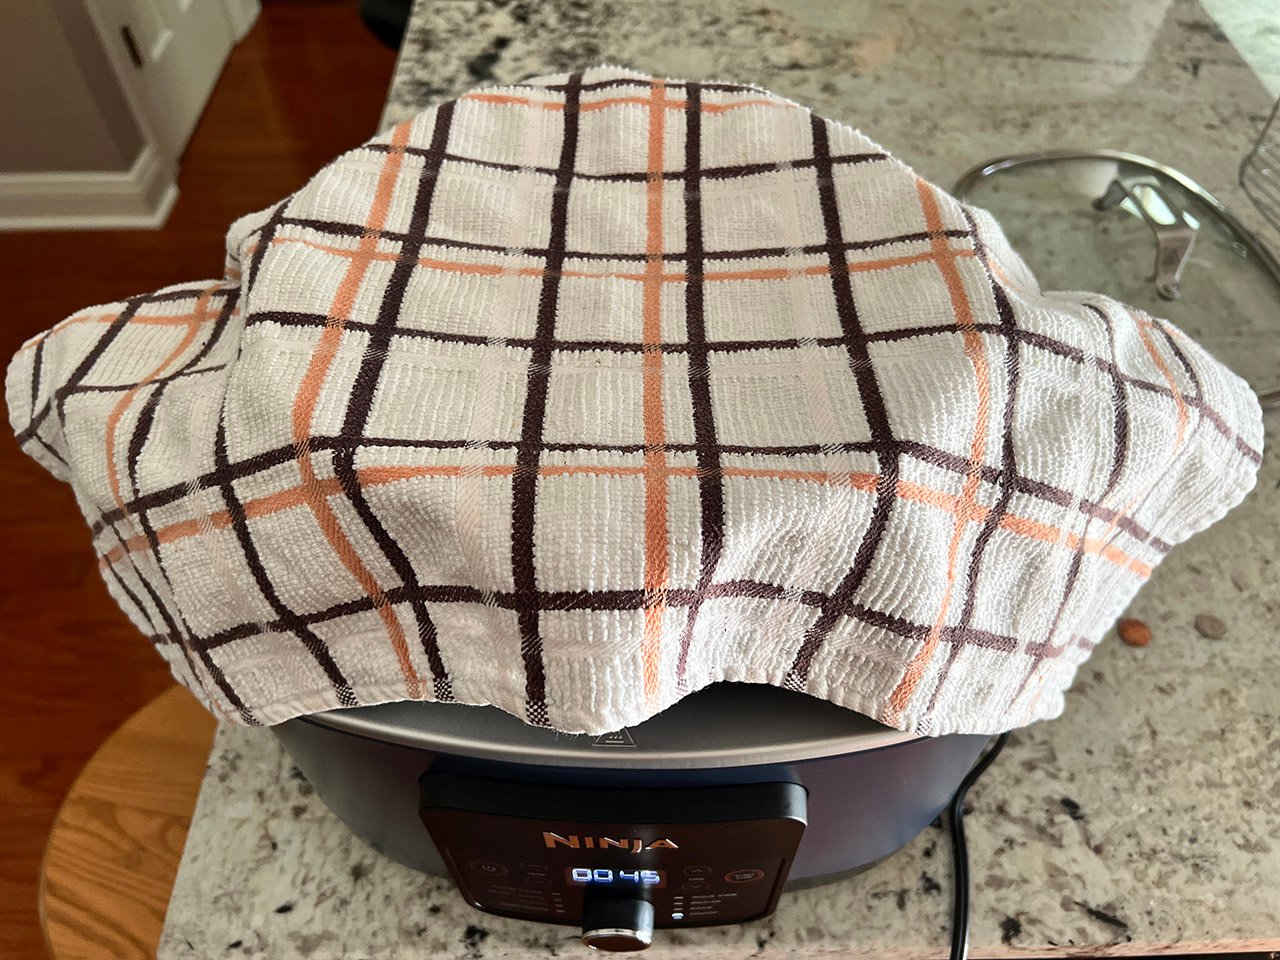
- Ninja Power! Unleash the inner pizza master within your Ninja Possible Cooker Pro! Just hit that “proof” mode button, and watch your dough rise like a ninja in the night. Warmth and moisture, all in one handy gadget – what more could a pizzaiolo ask for?
- Oven Light Show: Feeling low-tech? No worries! Turn your oven into a dough disco by simply popping on the light. That gentle heat will coax your doughy friend along, even without the full oven blast. Think of it as a private sunbeam just for your pizza-to-be.
Remember, finding a warm spot doesn’t have to be complicated. A sunny windowsill, a cozy corner near the radiator, even a tucked-away nook in your appliance haven – anywhere with a bit of extra warmth will do the trick. Just don’t stick your dough directly on a heat source, like a stovetop or heating vent. We don’t want any crispy edges before it’s time!
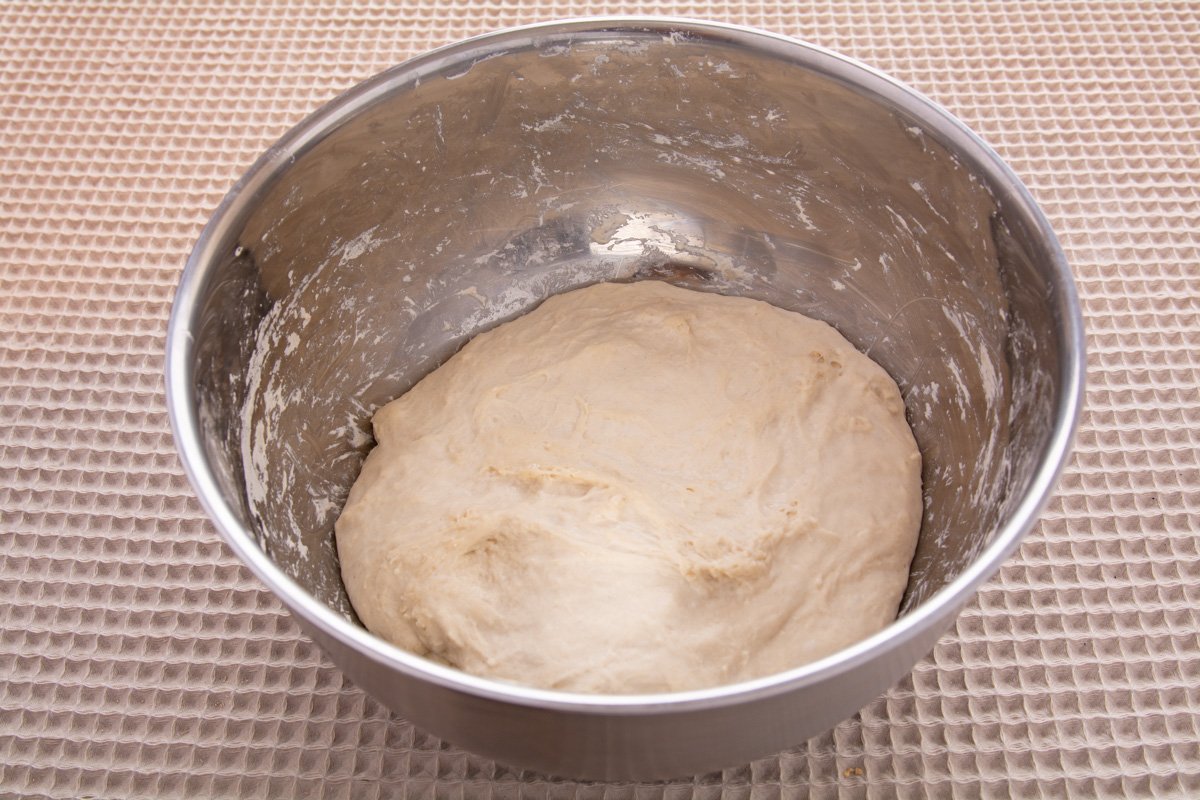
Our dough has almost doubled in size.

Alright, pizza champions, the battle cry has sounded! Your dough has puffed up like a majestic dragon, almost doubling in size and bubbling with yeasty victory. It’s time to unleash your inner pizza sculptor and transform this bubbly beast into perfectly portioned dough balls.
First things first, sprinkle some flour on your countertop like glittering pixie dust. This will prevent any dough-sticking shenanigans. Then, grab your doughy dragon and gently divide it into even portions, like knights sharing the spoils of a glorious pizza quest. Each piece should be around 300 grams, perfect for crafting personal-sized pizzas.
Now, picture these dough balls as doughy sleeping bags for your soon-to-be pizzas. Find some cozy proofing bowls and drizzle them with a touch of oil, like a magic potion for rise-tastic dreams. Carefully nestle your dough balls inside, seam side down, like tucking in a sleepy kitten. Cover those bowls with plastic wrap or damp cloths, and watch as they puff up once more, ready for their final transformation.
Remember, patience is a pizzaiolo’s superpower! Let your dough balls rest and rise until they’re about doubled in size again. Soon, they’ll be begging to be stretched, topped, and baked into pizza perfection. So grab your rolling pin, unleash your creativity, and get ready to conquer the doughverse, one delicious slice at a time!
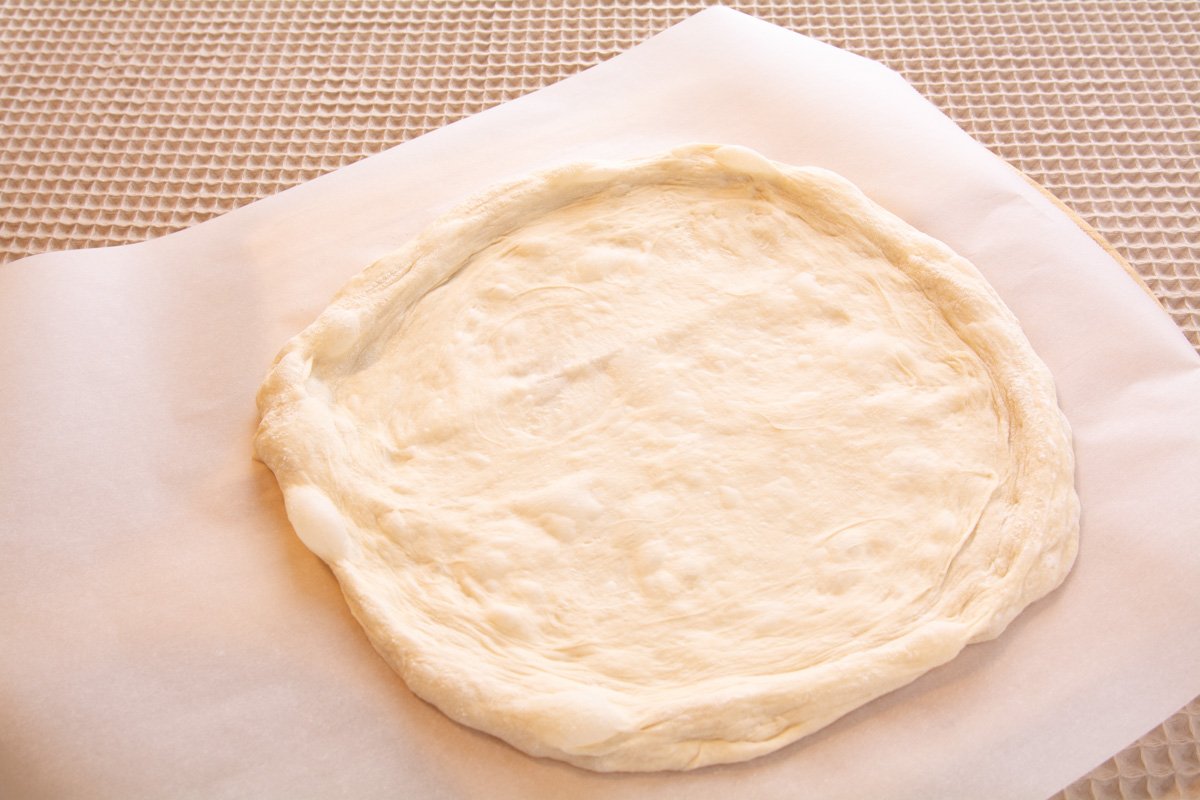
Alright, dough whisperers, time to transform those fluffy balls into pizza canvases! Gently grab your dough ball and picture it as a sleepy cloud you’re coaxing awake. With your fingertips, stretch it outwards, like shaping a fluffy pillow for your toppings. Remember, be gentle like a butterfly landing on a flower – no need to manhandle the dough!
Here’s the secret to that glorious bubbly edge, the “cornicione” as the fancy pizzaiolos call it: resist the urge to press down on the outer rim. Let it puff up naturally, like a happy little cloud catching the sunrise. The air bubbles trapped inside will become those crispy, airy pockets of perfection you dream of.
So stretch, whisper, and gently coax your dough into a beautiful circle. Don’t worry if it’s not perfectly round – pizza is all about personality, right? Just make sure there’s enough space for your cheesy, saucy masterpieces. And remember, the more bubbly the edge, the happier the pizza (and probably you too!). Now, get creative with your toppings, fire up that oven, and get ready to conquer the doughverse one delicious slice at a time!
Crank up that oven, pizzaiolos! Get your stone or steel sizzling hot (like, “volcano in training” hot). While it warms up, let’s paint your pizza canvas with your favorite toppings. Think of it like creating a masterpiece that’s equal parts delicious and drool-worthy.
Then, give the edge of your doughy dream a quick kiss of olive oil. I’m talking a light misting, not a swimming pool situation. This will transform your crust into a crispy, golden wonderland. Now, carefully slide your pizza onto a sheet of parchment paper – think of it as a magic carpet ride straight into the fiery pizza oven.
Finally, keep a watchful eye on your doughy masterpiece as it cooks to your desired doneness. We’re talking bubbly crust, melty cheese, and toppings singing “Hallelujah” with every sizzling sizzle. Remember, every oven is different, so be the pizza whisperer you are and adjust the time as needed.
Soon, you’ll be slicing through a pizza that’s a symphony of flavors and textures. Enjoy every bite, fellow pizza champion! You’ve earned it.
Calling all pizzaholics and crust connoisseurs! If you loved this poolish dough adventure, then buckle up for another slice of doughy goodness! Head over to my no-knead pizza dough recipe and discover a whole new way to conquer the crust-crafting universe. It’s like instant pizza gratification, minus the kneading marathon. Plus, it’s packed with tips, tricks, and troubleshooting wisdom to guide you every step of the way. So go forth, doughy explorers, and unleash your inner pizzaiolo! Remember, the pizza-verse awaits, and your next perfect pie is just a click away.
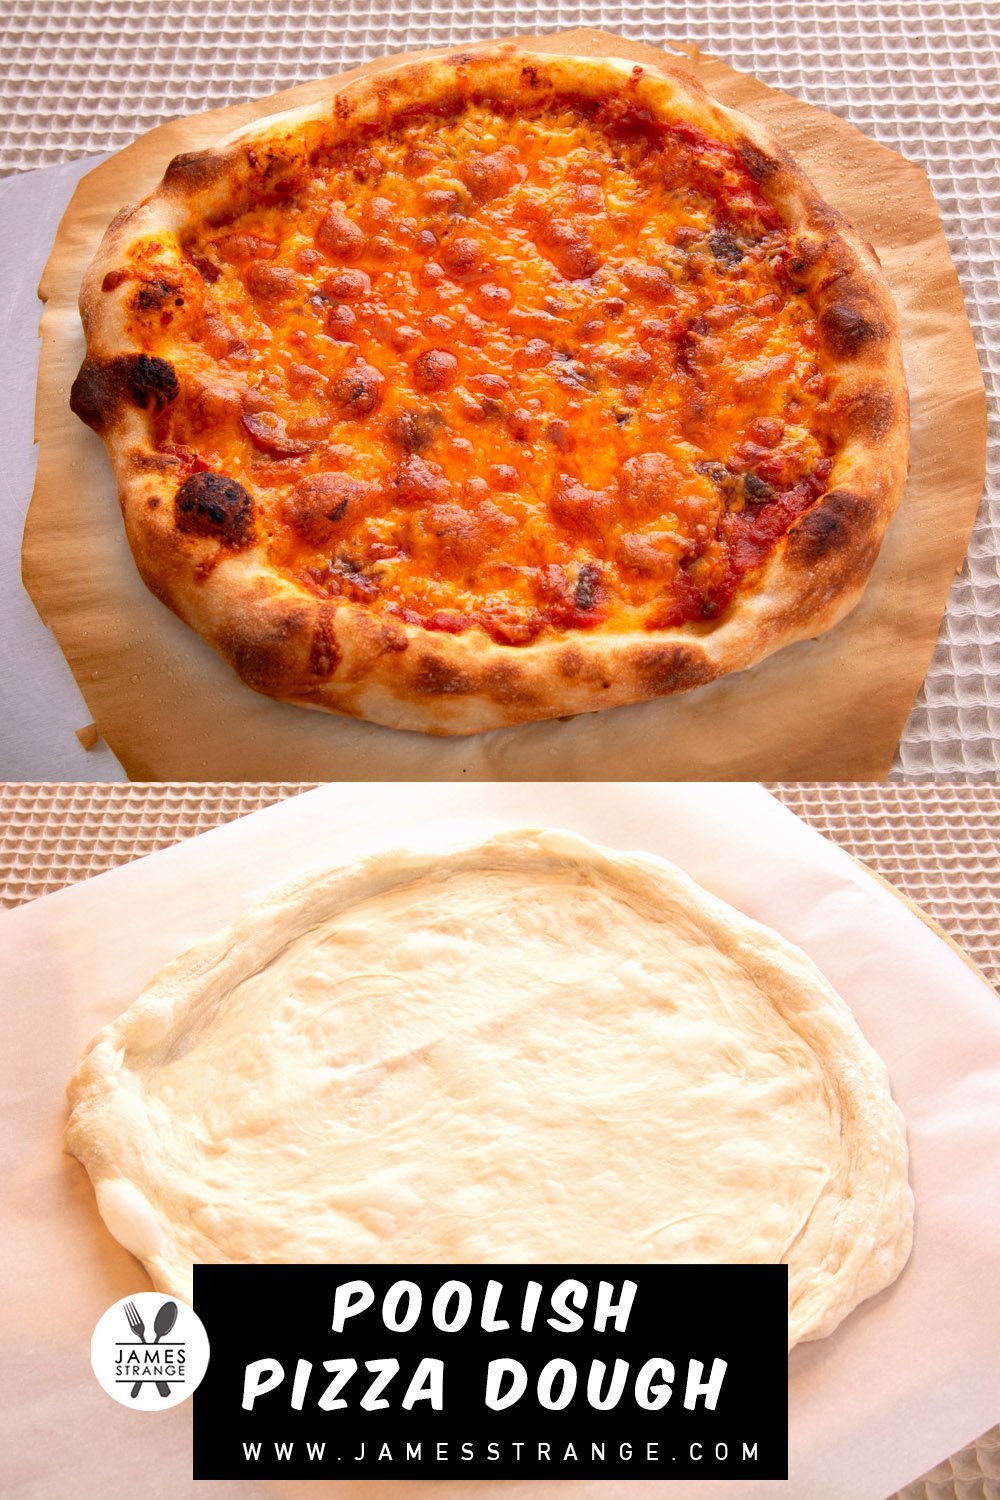
Sharing pizza magic is a noble quest, and I’d be happy if you were to spread the doughy delight on Pinterest!

Ingredients
Poolish
- 135 grams Flour
- 135 grams Water
- .90 grams Instant yeast
Pizza dough
- 389 grams Flour
- 238 grams Water
- 8 grams Salt
- 1 teaspoon Olive oil
- 3 Tablespoons Flour For the counter
Instructions
Make the Poolish
- Mix together all of the poolish ingredients.135 grams Flour, 135 grams Water, .90 grams Instant yeast
- Cover the poolish and let rest on the counter for 8 to 10 hours, the dough should have lots of small bubbles. The poolish is now ready to use or place into the fridge until ready.
Make the dough.
- Mix the poolish with the water to combine.238 grams Water
- Add the salt to the flour and mix.389 grams Flour, 8 grams Salt
- Add your dry ingredients (flour and salt) to your wet (water and poolish).
- Combine your ingredients into a shaggy dough, cover and let rest for 30 to 45 minutes.
- Perform stretch and folds to the dough then fold it onto itself and cover, let rest until the dough has almost doubled in size.
- Dust the counter with flour and divide the dough into equal portions.
- Lightly oil bowls with olive oil.
- Form dough balls and place into the bowls. Cover and let rise until doubled in size.
- Form your pizza disk, careful not to push the air out of the edges.
- Top your pizza, a little olive oil on the edge of the crust and then bake in a hot oven until done.