Remember when simple carbs were a dream and intricate bread techniques felt like climbing Mount Doughmore? Yeah, me too. So, when cravings strike and that irresistible bready scent whispers my name, there’s only one answer: sourdough. But hold on, I’m not about to spend all day wrestling dough like a medieval baker (kudos to those masters!).
That’s why Ben Starr’s “Simple Sourdough for Lazy People” video was a game-changer. Simple? Check. Lazy? Checkmate. I may have tweaked the salt a bit (gout, ya know?), but this recipe is pure gold. You barely break a sweat, yet the result is crusty, tangy heaven in every bite.
Link to the video that inspired me to get back into sourdough.
So, fellow carb-cautious bakers, let’s raise a (gluten-free?) glass to delicious, effortless sourdough! Trust me, this recipe is your lazy (and delicious) ticket to bread bliss.

The ingredients for our sourdough bread are very simple:
Forget chasing rogue yeasts around dusty attics – my sourdough starter arrived in a neat Amazon package, like a tiny bread-baking BFF. Followed the instructions (no yeast wrangling required!), and boom! Starter prepped, bread oven preheating… carb cravings, prepare to meet your match! Affiliate link to the starter on Amazon: https://amzn.to/3NUMHzA
Feeding your sourdough starter is like tending to a tiny, bubbly pet – with the delicious reward of fresh-baked bread at the end! Here’s a beginner-friendly guide to keeping your starter happy and hungry:
Gather your supplies:
- Your sourdough starter: This should be in a clean jar or container.
- Fresh flour: Organic, unbleached all-purpose or bread flour is ideal. Avoid using bleached flour, as it lacks the nutrients your starter needs to thrive.
- Water: Filtered or bottled water is best, as tap water can sometimes contain chlorine or chloramines that can harm your starter.
- Spoon: A sturdy spoon for mixing and discarding starter.
- Kitchen scale (optional): While not essential, a scale ensures precise measurements for consistent feeding.
Step 1: Discard and refresh
- Open your starter jar and gently stir it. Discard about half of the starter, aiming to keep only the active, bubbly portion at the top. You can discard the starter in your compost bin or mix it into pancake batter or crackers for a tangy boost. Discarding sourdough starter
Step 2: Feed the beast
- Add equal parts flour and water to the remaining starter in your jar. For example, if you have 50 grams of starter, add 50 grams each of flour and water. Aim for a thick, porridge-like consistency. Feeding sourdough starter
Step 3: Mix it up
- Use your spoon to mix the starter, flour, and water until well combined. Scrape the sides and bottom of the jar to ensure everything is incorporated.
Step 4: Cover and rest
- Loosely cover your jar with a lid or breathable cloth. This allows air circulation while preventing contamination. Place your starter in a warm spot, ideally around 70-75°F (21-24°C).
Step 5: Be patient!
- Your starter will need time to wake up and become bubbly again. This can take anywhere from 4 to 12 hours, depending on its maturity and the ambient temperature.
Bonus tips:
- Feeding schedule: Once your starter is mature and active, you can feed it once or twice a day, depending on your baking frequency. If you bake often, feed it twice a day. If you bake less frequently, once a day or even once every few days is sufficient. Just remember to discard half and feed with equal parts flour and water before baking.
- Storage: If you’re not baking regularly, you can store your starter in the refrigerator. Feed it once a week, discarding half and refreshing it with equal parts flour and water.
- Experiment! Once you’ve mastered the basics, try different flours like rye or whole wheat to add depth of flavor to your bread.
With a little love and attention, your sourdough starter will become a cherished companion on your bread-baking journey. Remember, patience is key, and the reward of a crusty, flavorful loaf is well worth the wait!
Salt: I use fine sea salt without iodine. Iodine can be detrimental to the wild yeast in your starter, so choosing a salt without it is key. Whether you use fine sea salt, kosher flakes, or another variety, the important thing is to check the label for iodine-free options.
Filtered Water: Though tap water contains minerals, these can vary greatly depending on your location and treatment methods. Some types of minerals might inhibit yeast activity or affect gluten development. Using filtered water ensures a consistent water source with minimal mineral variations.
Bread Flour:
While you can technically make sourdough bread with all-purpose flour, bread flour offers several advantages that contribute to a superior final product:
Protein Power: Bread flour typically boasts a higher protein content (12-13%) compared to all-purpose (10-11%). This protein forms gluten, the network that provides structure and elasticity to your dough. With more protein, bread flour creates a stronger dough that can handle the long fermentation times inherent in sourdough, leading to better oven rise and an airier, fluffier crumb.
Hydration Hero: High-protein bread flour also absorbs more water, allowing you to create a wetter dough without it becoming sticky or unmanageable. This wetter dough contributes to a crustier exterior and a moister, chewier interior.
Flavor and Texture: Gluten development also impacts flavor and texture. Bread flour yields a chewy, crusty loaf with a satisfying bite, which many consider the classic characteristic of sourdough. All-purpose flour tends to produce a denser loaf with a less developed crumb.
Rise and Shine: The extra gluten in bread flour provides better support for your dough during fermentation and the bake. This translates to a taller, more impressive rise and a more even loaf shape.
Don’t be intimidated: While bread flour offers certain benefits, all-purpose flour can still yield delicious sourdough! If you’re just starting out or don’t have bread flour on hand, go for it and adjust your hydration level slightly for a drier dough.
Ultimately, the best flour for your sourdough depends on your preferences and goals. Experiment with both and see which you prefer! Happy baking!
Time:
In the magical world of sourdough, time becomes your secret ingredient, influencing nearly every aspect of the final loaf. It’s like a slow-motion dance between the wild yeast in your starter, the flour, and the water, where patience unlocks a depth of flavor and texture unlike any other bread. Here’s why time matters so much:
Fermentation magic:
- Flavor development: During slow fermentation, the wild yeast in your starter munch on sugars in the flour, producing delicious byproducts like lactic acid and acetic acid. These contribute to the tangy, nutty, and earthy notes that distinguish sourdough. The longer the fermentation, the more complex and rich the flavor profile becomes.
- Gluten development: Time allows gluten strands in the flour to relax and stretch, building a strong network that traps air during baking. This results in a well-risen loaf with a light and airy crumb. Short fermentation results in a denser bread with less chew.
- Nutrient breakdown: Longer fermentation breaks down gluten and complex carbohydrates in the flour, making them easier for our bodies to digest. This also enhances the bioavailability of certain nutrients, making sourdough a more nutritious bread option.
Beyond the dough:
- Starter care: Your sourdough starter, a living ecosystem of yeast and bacteria, thrives on regular feedings and time to build strength. Consistent timing creates a predictable and vibrant starter, leading to successful bakes.
- Baking schedule: Planning your baking around fermentation times allows you to fit bread-making into your life. Long bulk fermentation can happen overnight while shaping and proofing can be done while you’re at work or running errands.
Timing as an art form:
While recipes provide guidelines, mastering sourdough involves understanding the interplay between time, temperature, and your specific starter. Learning to “read” your dough, observing its rise and texture, empowers you to adjust fermentation times and achieve consistent results.
So, embrace the slow tempo of sourdough. Let time work its magic, transforming simple ingredients into a bread bursting with flavor, texture, and a story of patience and care.

Dough Dance Time!
- Flour Power: Let’s get this party started by mixing our dry buddies, flour and salt, in a big bowl. Think of it as building a fluffy cloud castle!
- Wet Squad: In another bowl, gather your starter and water – the bubbly dream team! Give them a quick stir to become one happy, wet squad.
- Unite the Kingdoms!: Now, bring these two bowls together! Gently fold the wet squad into the dry castle, until they just know each other. Don’t overwork them, let them get cozy, but make sure all the flour joins the party.
- Snooze Time: Tuck your doughy friend under a damp towel and let it rise at room temp. Think of it as a nap to grow big and strong! It can take between 12 and 24 hours, so don’t be surprised if it sleeps in a bit. I let mine snooze for 14 cozy hours overnight.
- Banneton Bonanza!: Wake up your dough ball and sprinkle some flour magic inside your banneton (fancy bowl for fancy bread!). Any flour will do, but the artisan crew loves rice flour.
- Round & Proud: Sprinkle some floury love on your countertop and gently shape your dough into a chubby round loaf. Place it, seam side up, in your banneton/bowl, and tuck it back under the towel for another 2-4 hour rise. Picture it basking in the sunshine on a fluffy cloud!
- Prepping for the Grand Finale: As your dough wakes up for the last hour, get your Dutch oven (a pot that loves bread!) nice and hot in the oven at 425°F (220°C). Think of it as preheating the stage for your bread’s big debut! I like to use a 4-quart Dutch oven when I can.

This is my dough after playing it in my banneton bowl, but any bowl will work.

Bake Ahead Bread Bliss:
Want fresh sourdough magic but with zero morning rush? This hack’s for you! Make the dough as usual, then skip the fancy counter dance and tuck it into a cozy plastic bag (think comfy pajamas for your dough!). Pop it in the fridge for a day or two – it’ll chill out and build flavor while you tackle the day.
When you’re ready for some crusty magic, bring your dough out of the fridge and let it warm up to room temp (it’s like waking up on a sunny morning!). Once it’s awake and bubbly, gently shape it into a round ball, like a happy bread-baby. Place it in its comfy banneton or bowl and let it rise again until it’s doubled in size – think of it as taking a long, satisfying nap.
Now, here comes the oven fun! Preheat your oven to 425°F (220°C) while your dough finishes its rise. Pop your covered doughy friend in the oven for 30 minutes, let it steam up, and get nice and fluffy. Then, uncover it and let it bask in the heat for another 15 minutes, browning to a beautiful golden finish.
And bam! Fresh-baked sourdough bliss, even though you made it yesterday! Sit back, enjoy the warm, crusty goodness, and pat yourself on the back for your genius planning. Happy baking!
Bonus Tip: Want to impress your friends even more? Sprinkle some seeds or flakes on top of your dough before baking for an extra flavor and texture punch. Chia seeds, sesame seeds, or even rolled oats add a delightful little crunch!

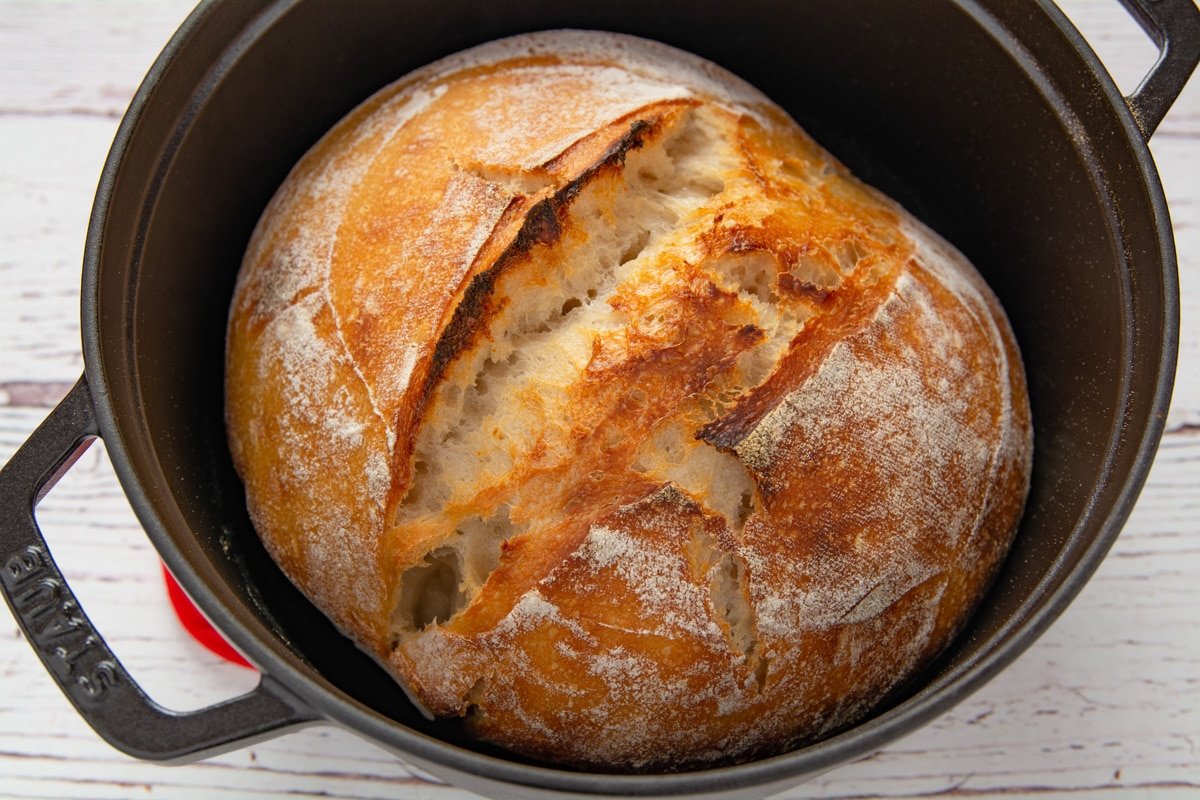
Time to unleash your inner bread artist! Carefully transfer your doughy masterpiece to the awaiting very hot Dutch oven. Grab your sharp knife (think superhero landing, but for bread!), hold it at a slight angle, and give the top of your loaf a few confident scores. Think lightning strikes of flavor! ⚡
Now, here’s the magic: 30 minutes in the oven with the lid on, like a cozy baking blanket. Let the steam work its wonders, transforming your dough into a bubbly, fragrant wonder. Then, time to reveal its golden glory! Take off the lid for the last 15 minutes, letting the crust bask in the heat and turn into a beautiful, crispy canvas.
But the real hero here is internal temperature. Aim for that sweet spot between 205 and 210°F (96-98°C). Trust an instant-read thermometer for its trusty wisdom. When it gives the thumbs-up, you’ve got yourself a perfect loaf! So, preheat your oven, sharpen your knife, and get ready to witness the bread-baking magic!

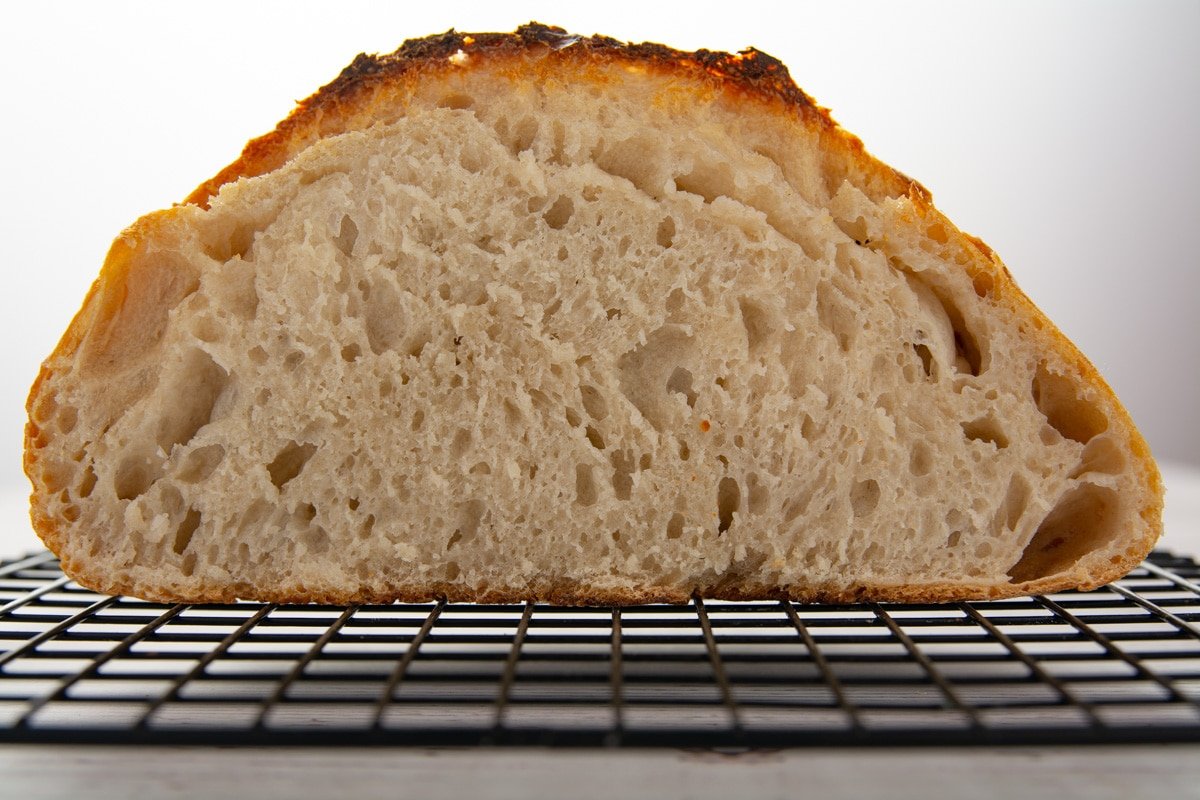
Trust me, the aroma wafting from that oven is enough to test the willpower of even the most patient baker. But resist the urge! Let that beautiful loaf cool completely on a wire rack. Think of it as giving your bread a well-deserved spa day after its fiery oven adventure. ♀️
Why the wait, you ask? Well, cutting into hot bread is like peeking at Christmas presents early – you ruin the surprise! The magic happens inside the loaf as it cools. The internal temperature stabilizes, creating a sliceable texture that’s light, airy, and oh-so-satisfying. Trust me, waiting will unveil the bread’s full potential, transforming it from “hot blob” to “crusty masterpiece.”
So, resist the siren song of the knife, my friend. Set a timer, pour yourself a celebratory glass of something delicious, and enjoy the anticipation. Soon, you’ll be rewarded with a bread-tastic experience that’s worth the wait. Happy baking!
Fresh-baked sourdough is a blank canvas for culinary creativity! Here are some inspiring ways to serve it up, from simple to sensational:
Classic Delights:
- Slather & Slice: The simplest pleasure – slather your warm loaf with butter, olive oil, or your favorite jam for a taste of pure bread heaven. Sprinkle with flaky sea salt for an extra punch of flavor.
- Soup Soakers: Tear off chunky pieces and dunk them in your favorite hot soup – the perfect vehicle for dipping and slurping.
- Cheese & Charcuterie Platter: Arrange sourdough slices alongside cheeses, cured meats, olives, and fresh grapes for an elegant and satisfying appetizer.
Beyond the Basics:
- French Toast Fiesta: Soak your bread slices in a custard mixture with a hint of cinnamon and vanilla, then pan-fry to golden perfection. Top with berries, whipped cream, or maple syrup for a decadent brunch treat.
- Bruschetta Bonanza: Rub toasted sourdough slices with garlic, drizzle with olive oil, and top with fresh tomatoes, basil, and a sprinkle of balsamic vinegar for an Italian-inspired snack.
- Grilled Cheese Glory: Elevate your grilled cheese game with thick sourdough slices. Melt melty cheese, add your favorite fillings like bacon and avocado, and press to golden perfection.
For adventurous eaters:
- Breakfast Bowl Bounty: Toast and crumble your sourdough to create the base for a breakfast bowl. Layer with yogurt, granola, fruits, and nuts for a nutritious and delicious start to your day.
- Mini Pizzas: Cut thin rounds from your loaf and top with tomato sauce, mozzarella cheese, and your favorite pizza toppings. Bake until bubbly and golden for a fun and flavorful appetizer.
- Sourdough French Fries: Cube your leftover bread, toss with olive oil, spices, and herbs, then bake until crispy. You’ll never reach for store-bought fries again!
Remember:
- Use a serrated knife for clean cuts and preserve the beautiful structure of your bread.
- Toasted sourdough adds a satisfying crunch to any dish.
- Leftover bread can be cubed and frozen for future croutons, breadcrumbs, or stuffing.
No matter how you choose to serve it, enjoy your freshly baked sourdough bread – it’s a labor of love and a true reward for the baker!
Ah, fellow lover of crusty bliss! So you devoured this recipe and are already craving another taste of rustic bread magic?
Well, you’re in luck! My easy basic rustic bread is like the OG of simple, satisfying loaves. Think 4 humble ingredients, zero fancy equipment, and minimal effort for maximum golden crust and chewy crumb satisfaction.
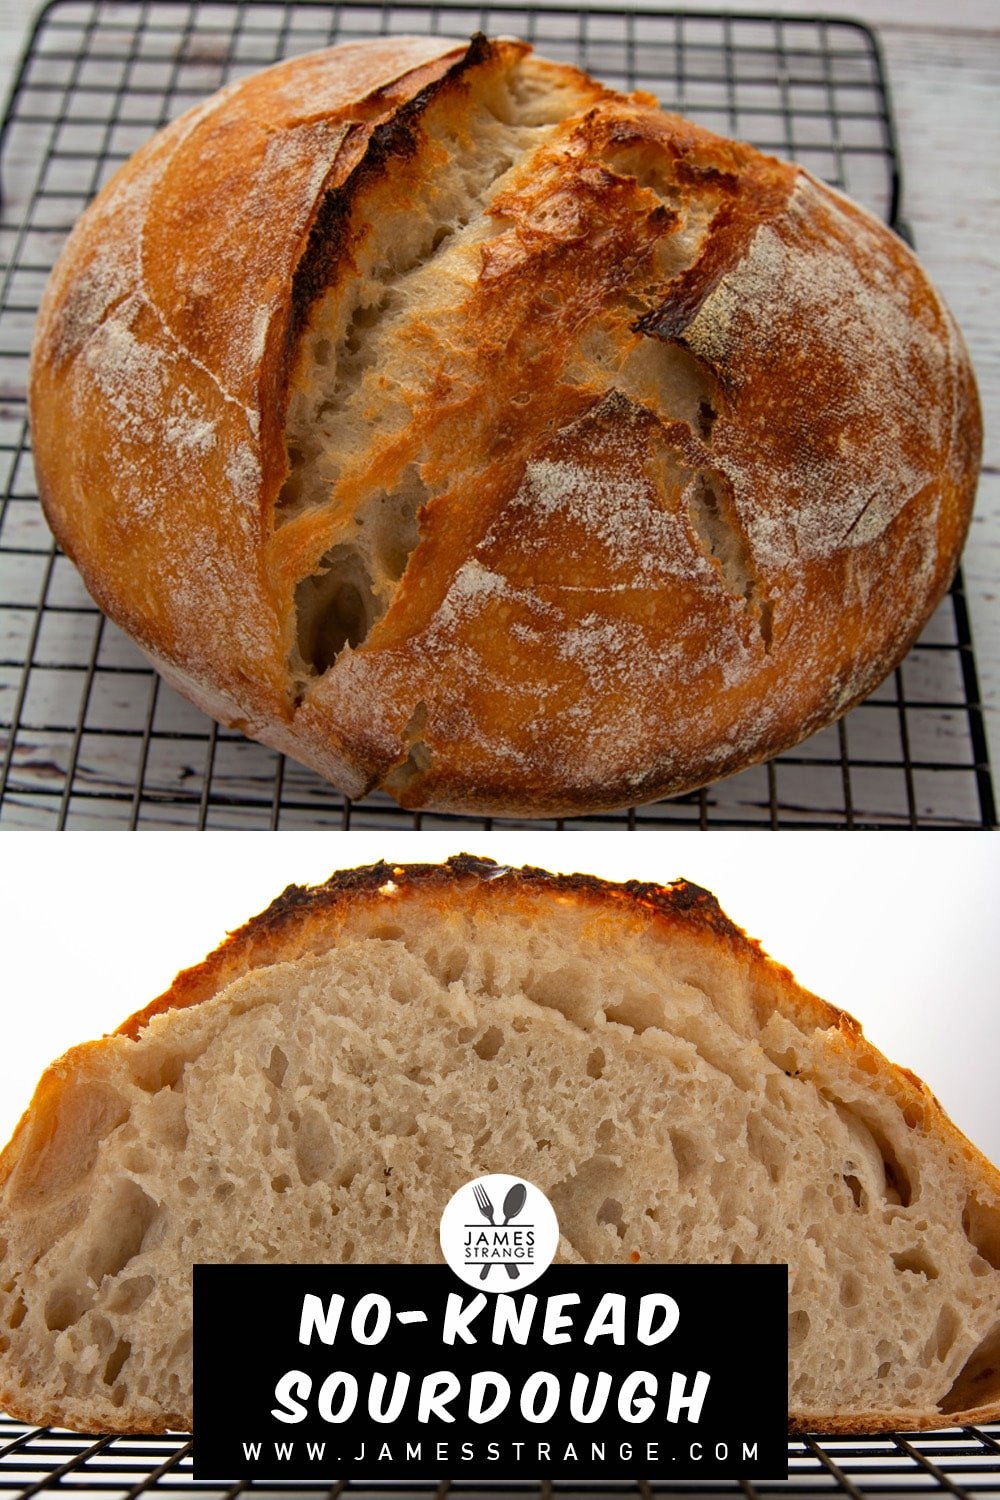
Can’t stop raving about this bread? Pin it to Pinterest and let your foodie friends join the sourdough party!

Ingredients
- 113 grams Sourdough starter
- 340 grams Water
- 567 grams Bread flour
- 17 grams Sea salt non-iodized salt
Instructions
Day 1
- In a large bowl, mix the sough dough starter and water.
- Mix the bread flour with the salt.
- Add the bread, flour, and salt with the water.
- Cover the dough and let rise at room temperature overnight or until doubled in size.
Day 2
- Dust the inside of your banneton or bowl with flour.
- On a counter lightly dusted with flour, shape your dough into a round loaf. Place your loaf seam side up into your banneton or bowl and cover with a towel. Allow rising time between 2 to 4 hours on the counter.
- During the last hour of rising time, place your dutch oven into the oven and preheat the oven to 425F (220C).
- Transfer your dough to the dutch oven, score the top of the bread, and bake covered for 30 minutes. Remove the cover and bake for another 15 minutes. The ideal internal temp is 205 to 210 F or 96 to 98 C.
- Remove the bread from the oven and allow to cool on a rack. After the bread has cooled it is ready to slice.
What type of flour do you use to dust your bowl? Do you line it with a towel first?
For the Banaton it comes with a cloth. That gets dusted with the same flour that I use for the dough. But a fancy bowl is not required. You can just use a regular bowl with a little flour so that the dough doesn’t stick.
Question: when putting dough in the fridge for later, is that instead of letting it sit at room temp? Or do I put it in the fridge the morning after the dough doubles?
First, thank you for asking your question, it helps others.
Normally I do not put it in the fridge. But sometimes life gets in the way etc. You can actually do it either way but my preferred way is to let it double first then hold it in the fridge until life gives me time to cook. Just allow extra time for the dough to warm up, become active again, and finish the second rise.
Excellent recipe. So easy. Great bread.