When I cook boneless and skinless chicken breast using sous vide they never turn out dry. Instead, it always comes out moist and tender.
When using normal cooking methods a lot of heat is applied to the outside of the meat. To completely cook the middle of the meat the outer portion is overcooked dry and tough. By using sous vide we use a stable temperature over a long period of time to bring all of the meat to the same temperature.
Chicken especially breast is one of the safest meat for a person with gout. But even chicken breast should be limited to four to six ounces per day. These breasts were around ten ounces each so each breast is two days worth. So the recipe card will show each breast is two portions.

When cooking sous vide, salt is about the only seasoning that will penetrate the meat. You can add garlic and herbs to the bag, but they only season the outside. I always add a tiny pinch of salt to the bag with my protein. It does penetrate and gives the meat a nice flavor. But a little does go a long way, so only add a tiny amount.
I never knew that there was an actual measurement for a pinch of salt. When I was decided to write this post, it was time to research the official “how much salt is in a pinch of salt?” Well, apparently, a pinch of salt is 1/6th of a teaspoon.
When sous vide this batch of chicken, a little less than 1/16th of a teaspoon was added to each bag. If the chicken needs more, it can be added later when we season before searing.
Is sous vide chicken safe?
If proper food handling, cooking, and chilling methods are followed, chicken-cooked using sous vide is very safe.
Only buy chicken from places with high turnover and a good reputation. Limit which surfaces come into contact with raw chicken. For more safety tips for raw chicken, visit the CDC website.
Usually, the safe temperature for cooking chicken is 165 F. When chicken is heated to 165 F, it is safe to eat immediately. In Sous Vide cooking, we hold the temperature for long periods of time; holding temperatures above 130 F makes chicken safe to eat.
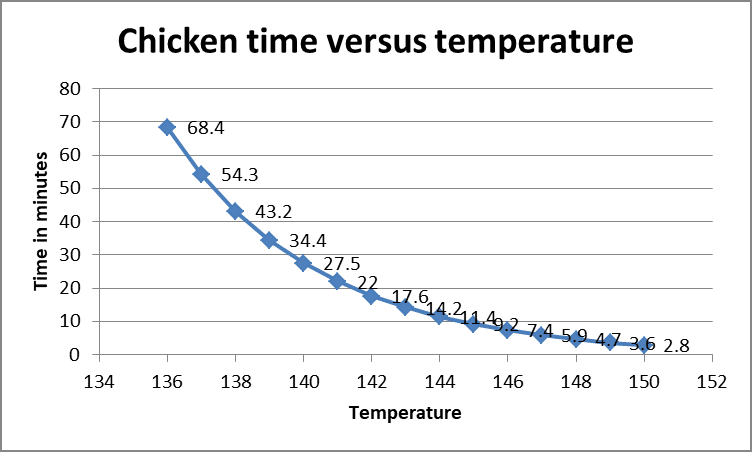
The chart above shows hold time versus temperature to achieve pasteurization. Higher temperatures require less time to achieve pasteurization. Note for the chart above that the time starts after the internal temperature has been achieved. In our case, after achieving 147F, we must hold that temperature for 7.4 minutes. The data for the chart is from the USDA and can be downloaded here.
That is all well and good, but since we do not have a thermometer in the chicken, how do we know when it is safe to eat? Well, since the water bath temperature is constant, it can be calculated based on thermodynamics. If you’re like me and do not want to calculate it, jump over to the sous vide timing ruler.
If you’re going to sear and consume the chicken immediately, you do not have to achieve complete pasteurization. But since it’s only an extra couple of minutes, why not?
Our breasts were one inch thick, and we cooked them at 147F, so our time was one hour and fifteen minutes. At 147F, the breast will still have some pink and a few red specks, but it’s still nice and juicy.
If you do not want any pink or red spots, sous vide to 150F. It will still be moist but will have a slightly different texture.
I have sous vide chicken breast at 137F for a long time. They were very juicy but kind of mushy and had lots of red spots. For most people, the big red spots are a turn-off. Note: My wife would not eat it.
While we are talking about the chicken’s internal temperature, dark meat should be cooked to 165F. Not for safety but for texture.
The recipe card will show one breast, but four will get cooked since the machine will be on. The other three will go into the freezer to be ready when I need them.
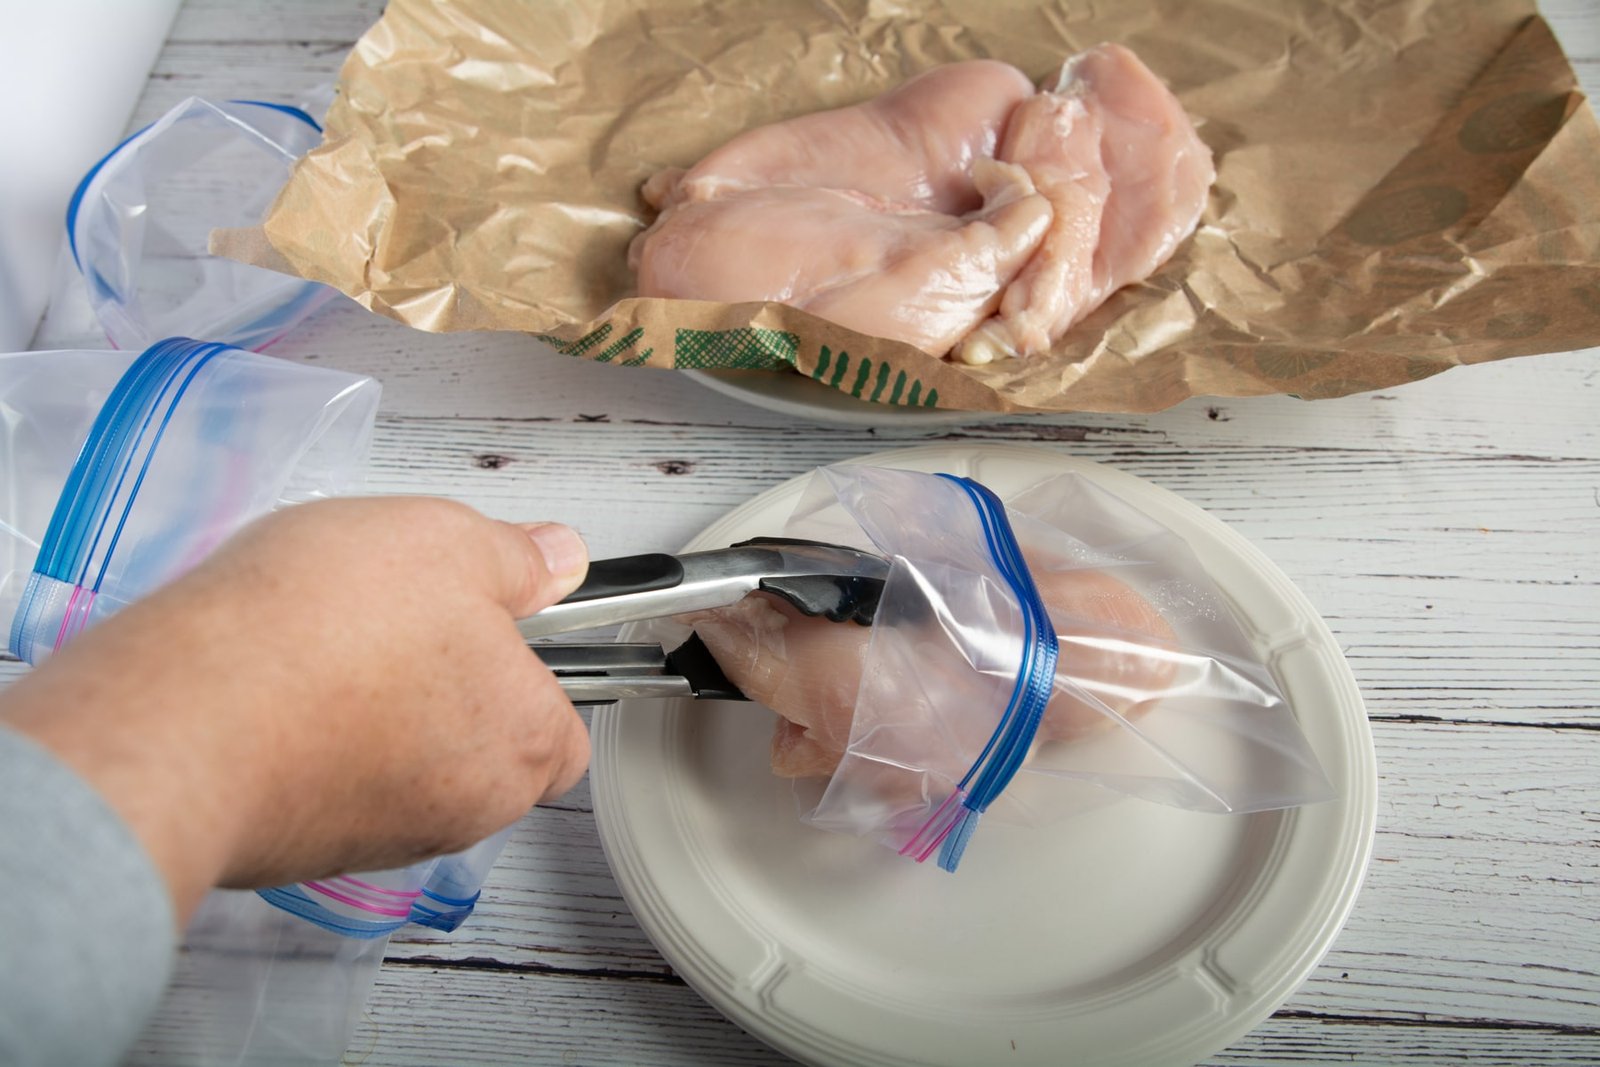
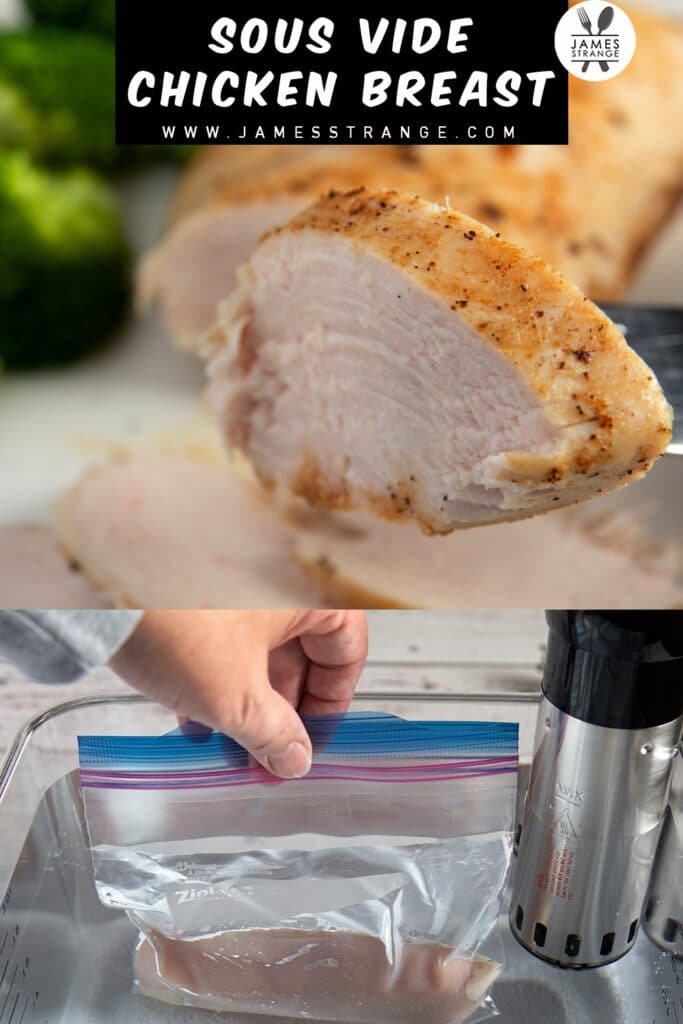
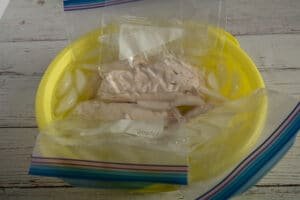
I am taking the chicken breast direct from the package it came in and placed it in a freezer bag. Tongs were used so that I did not have to touch the chicken. The top of the bags was rolled do to prevent contaminating the seal. Place the chicken in the bag roll the bag back to normal Add a small pinch of salt to each bag. Now we’re ready to seal.
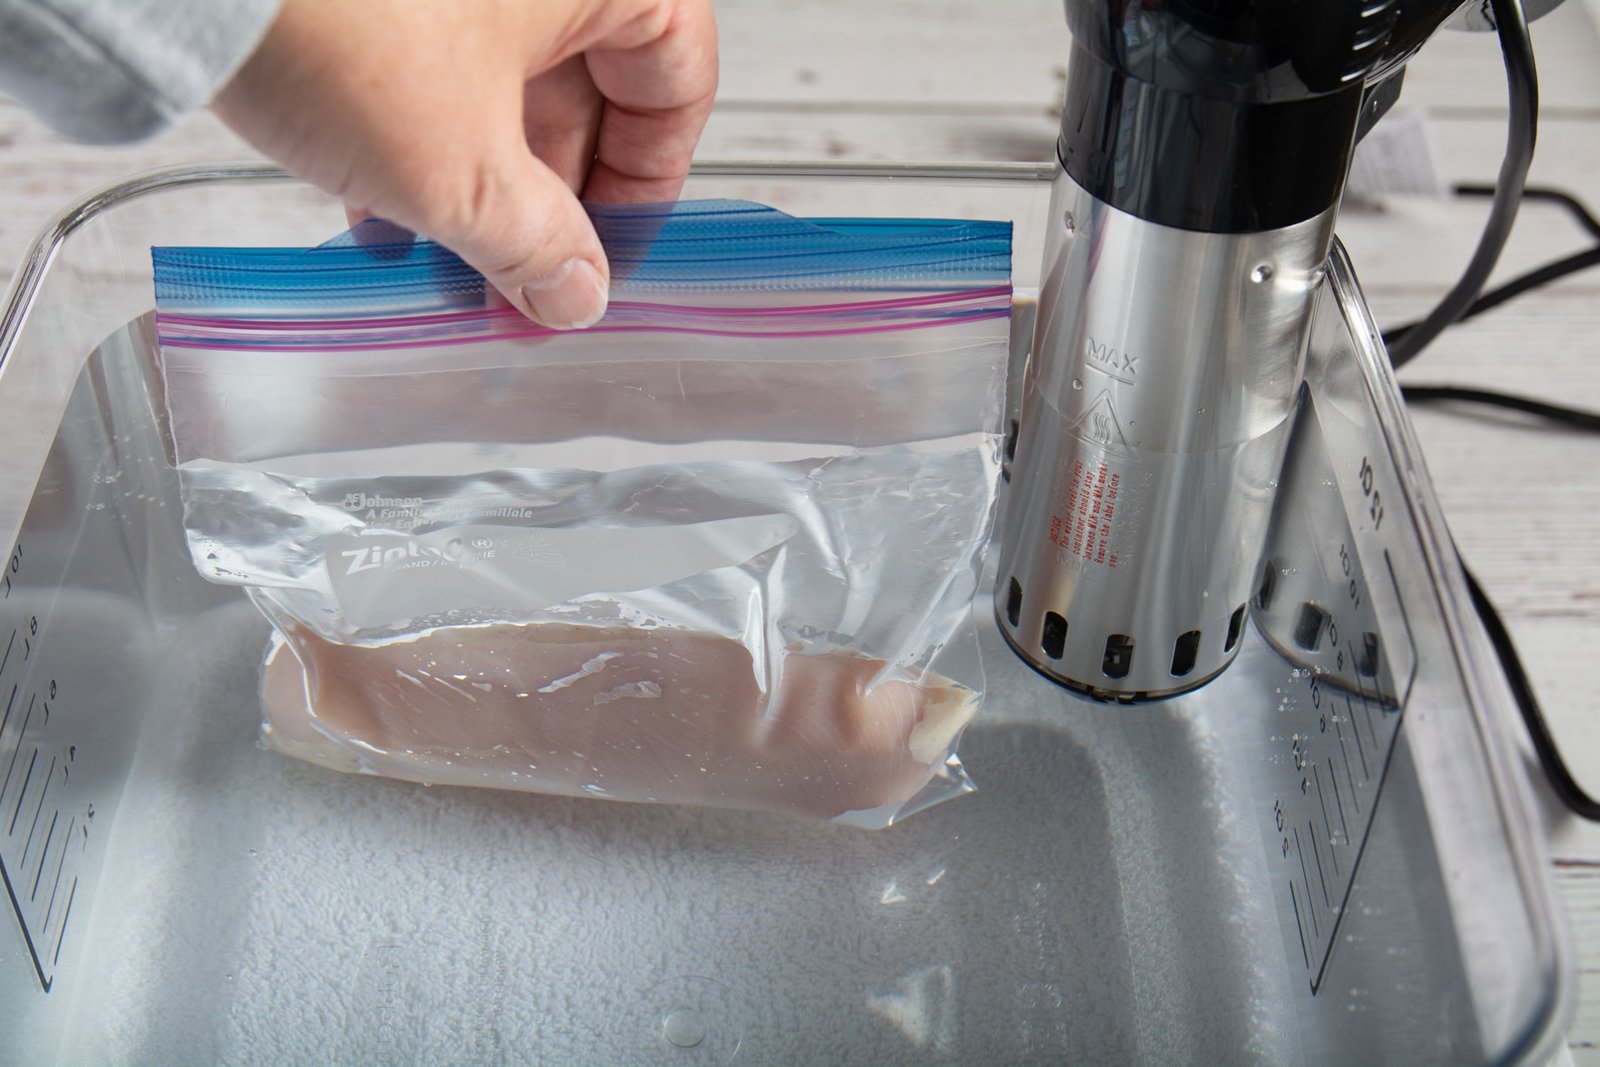
If you have a vacuum sealer, use vacuum seal bags and seal them up. But I wanted to show the water displacement method.
After the chicken is in the bag, smooth it out. It will take on the shape that it is in the bag. If it’s flat, then it will be easier to sear. After the chicken is flat, slowly lower the bag with the top open into the water. This should start to push out the air. When the water is almost up to the seal, then zip the bag closed. When you have all of the bags sealed, please place them in the refrigerator.
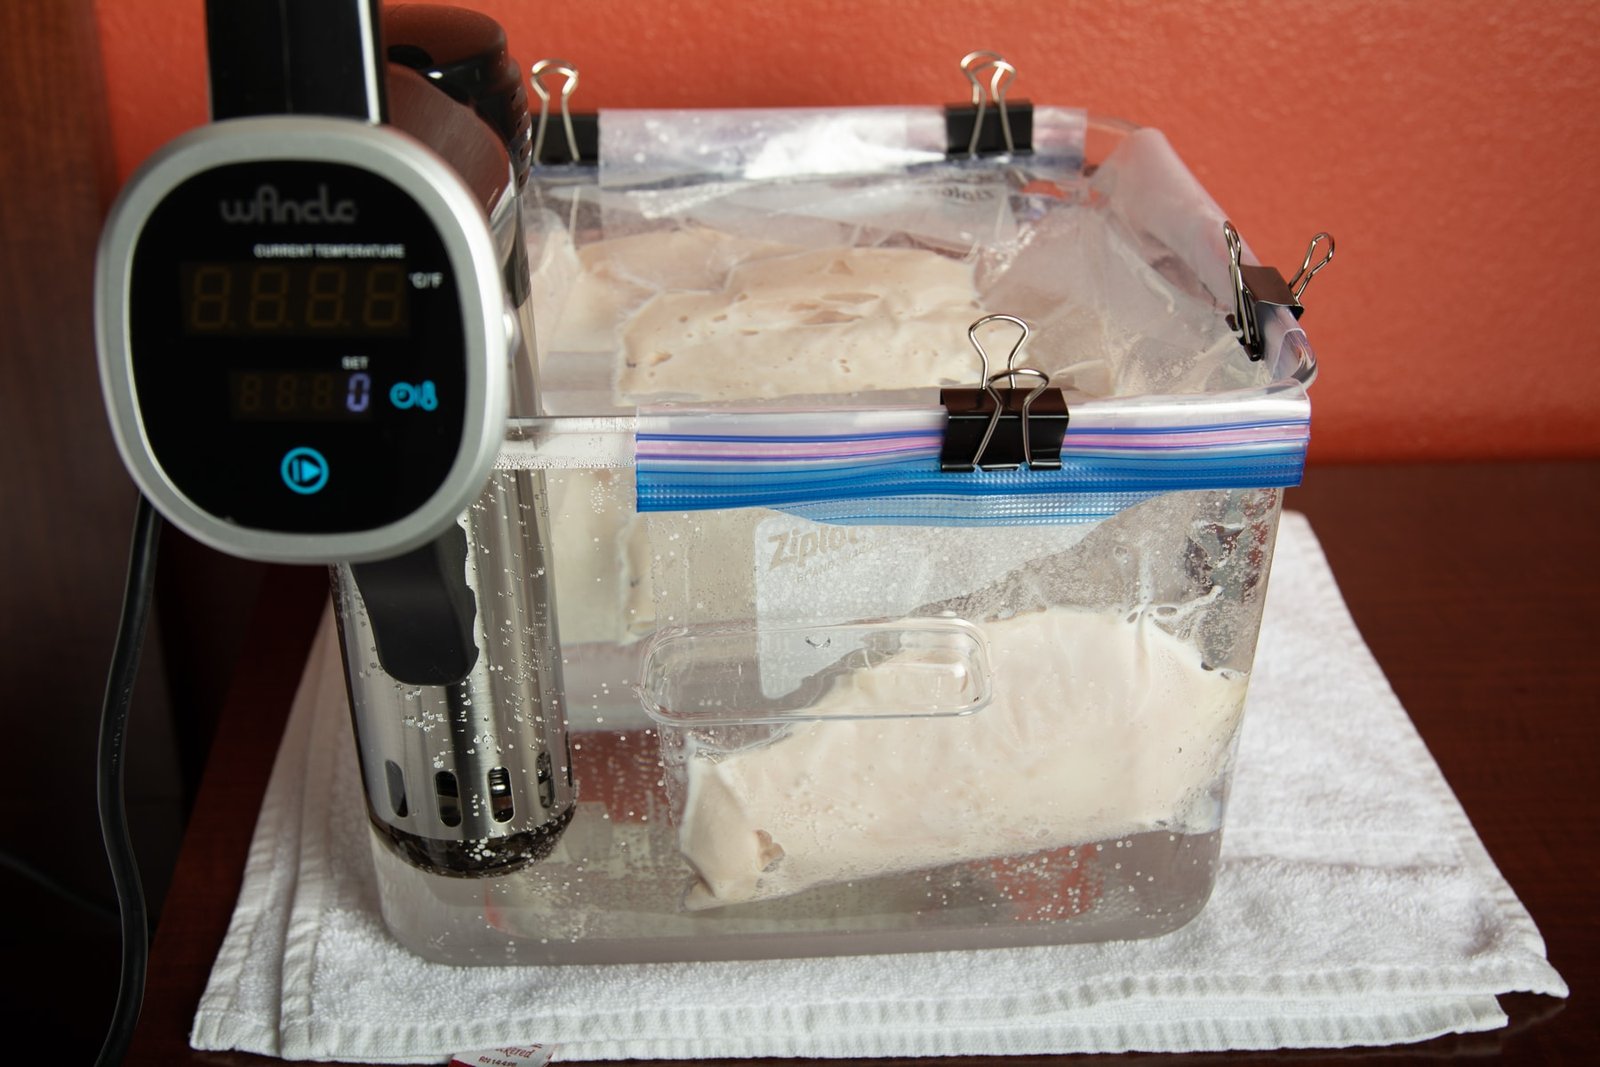
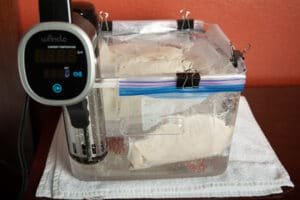
Set the temperature on your sous vide machine and let the water bath come up to temperature. I am using a food storage container but if you have a big pot you can use that.
When the water bath is up to temperature, clip the bags to the container. Just space them out so you can get water flow around the bags. Sous vide to the required time.
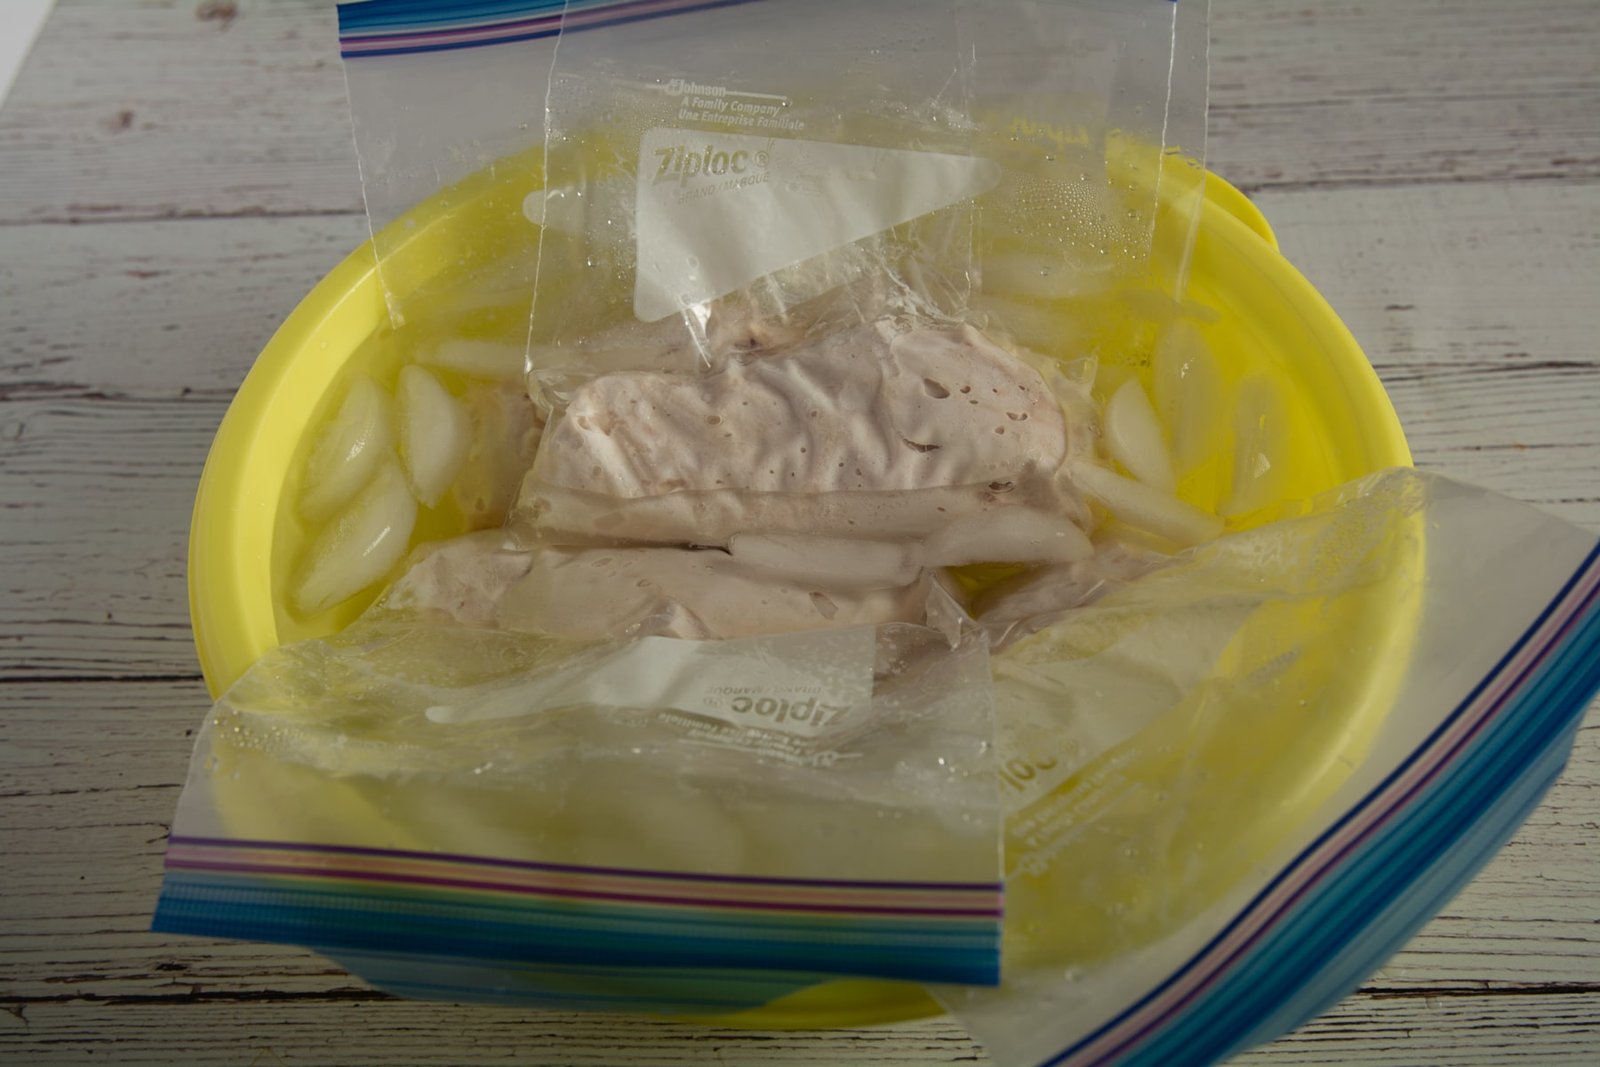
As soon as I take the chicken out of the hot water bath, they get put into an ice water bath. This will quickly cool them from the danger zone to the safe cold zone.
At this point, the chicken is fully cooked and ready to eat. It’s just not seasoned very well and does not look appetizing. But it would be great for chicken salad. But that is for another post.
We can store the extra sous vide chicken in the refrigerator for two days. Or we can store it in the freezer for up to six months. Before putting them in the freezer, dry off the bags, or they could stick to your freezer.
To thaw frozen sous vide chicken breast take them out the night before. Place onto a plate and into the refrigerator to thaw.
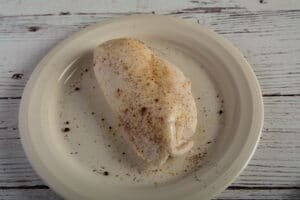
Let’s season our chicken today; we will lightly season since this post is focused on method more than anything else.
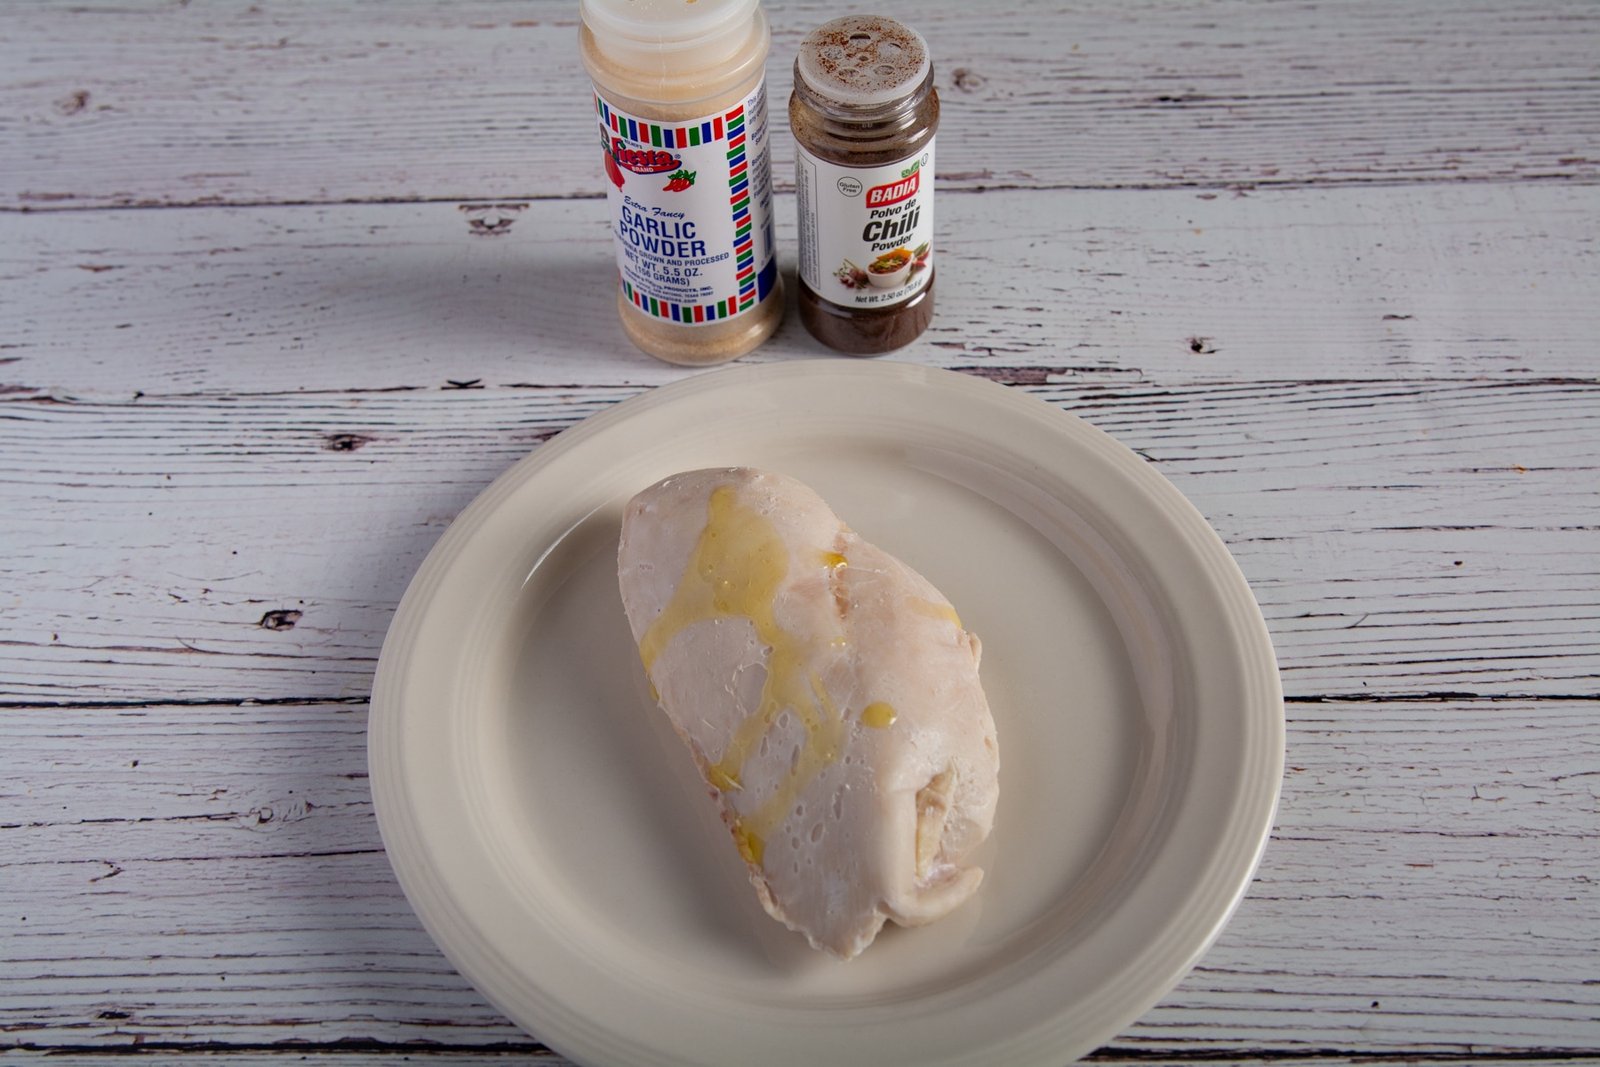
Remove the breast from the bag and use paper towels to dry it off. After it is dry, add a little oil and rub it around. This will help the seasoning stick.

After coating the breast with oil, season with whatever season you like. Today we used garlic and chili powder. Simple flavors and the chili powder gives a nice color.
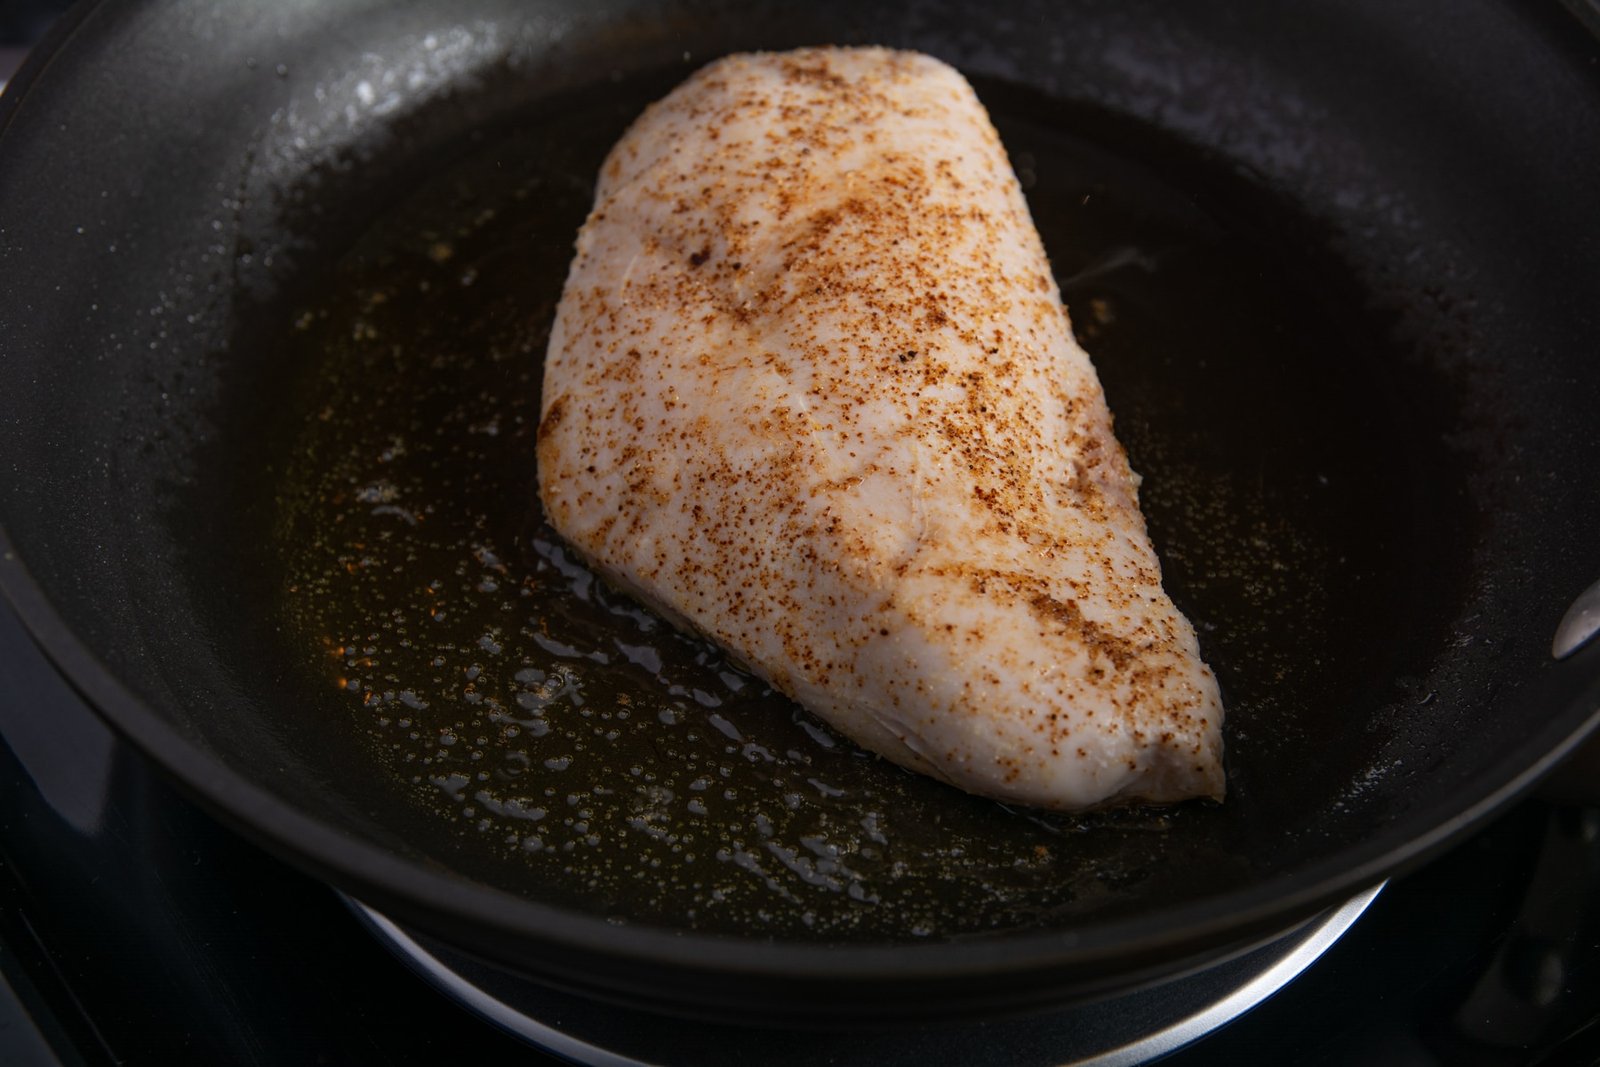
First, dry your chicken; if it has moisture on the surface, it will splatter when you place it in the hot oil. Place your pan on high heat and add oil with a high smoke point. I used peanut oil. Heat the pan until the oil starts to smoke. Then place your chicken into the hot pan.
Cook until this side starts to get some color, then flip. It should take less than a minute. Remember, the chicken breast is already cooked and safe to eat. This is so that it looks appetizing and has just a little crust.
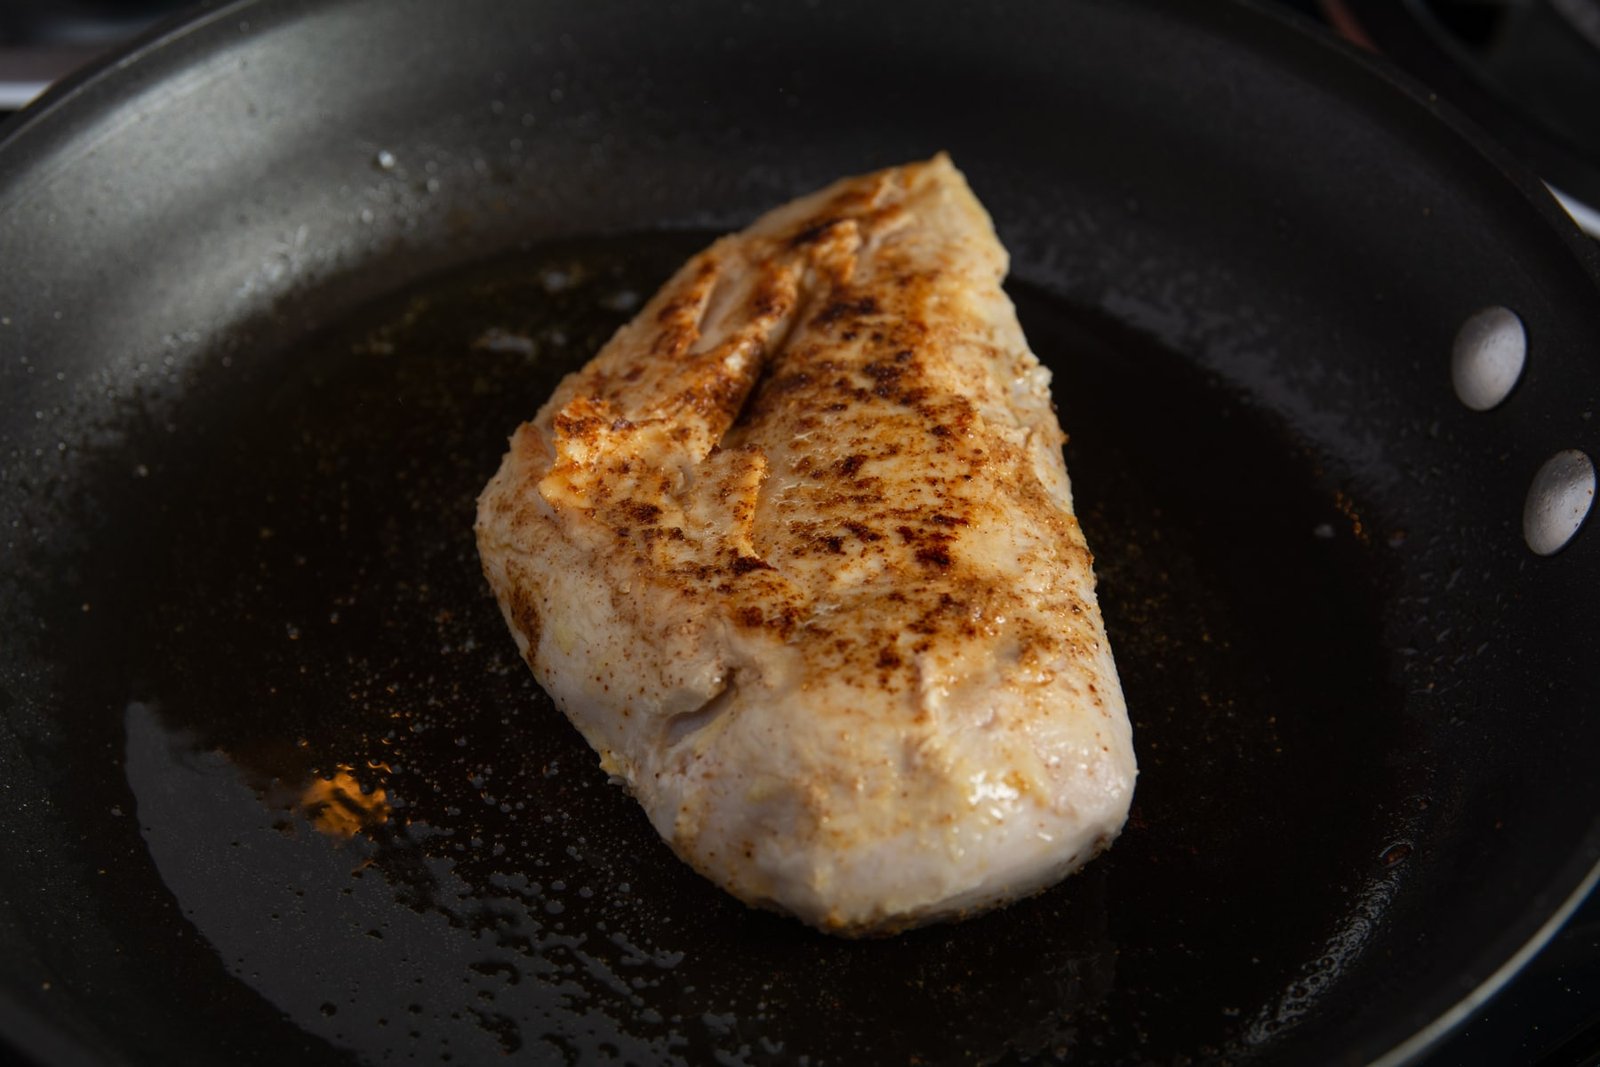
Now it’s time to brown the other side. Browning this side will take less than one minute.
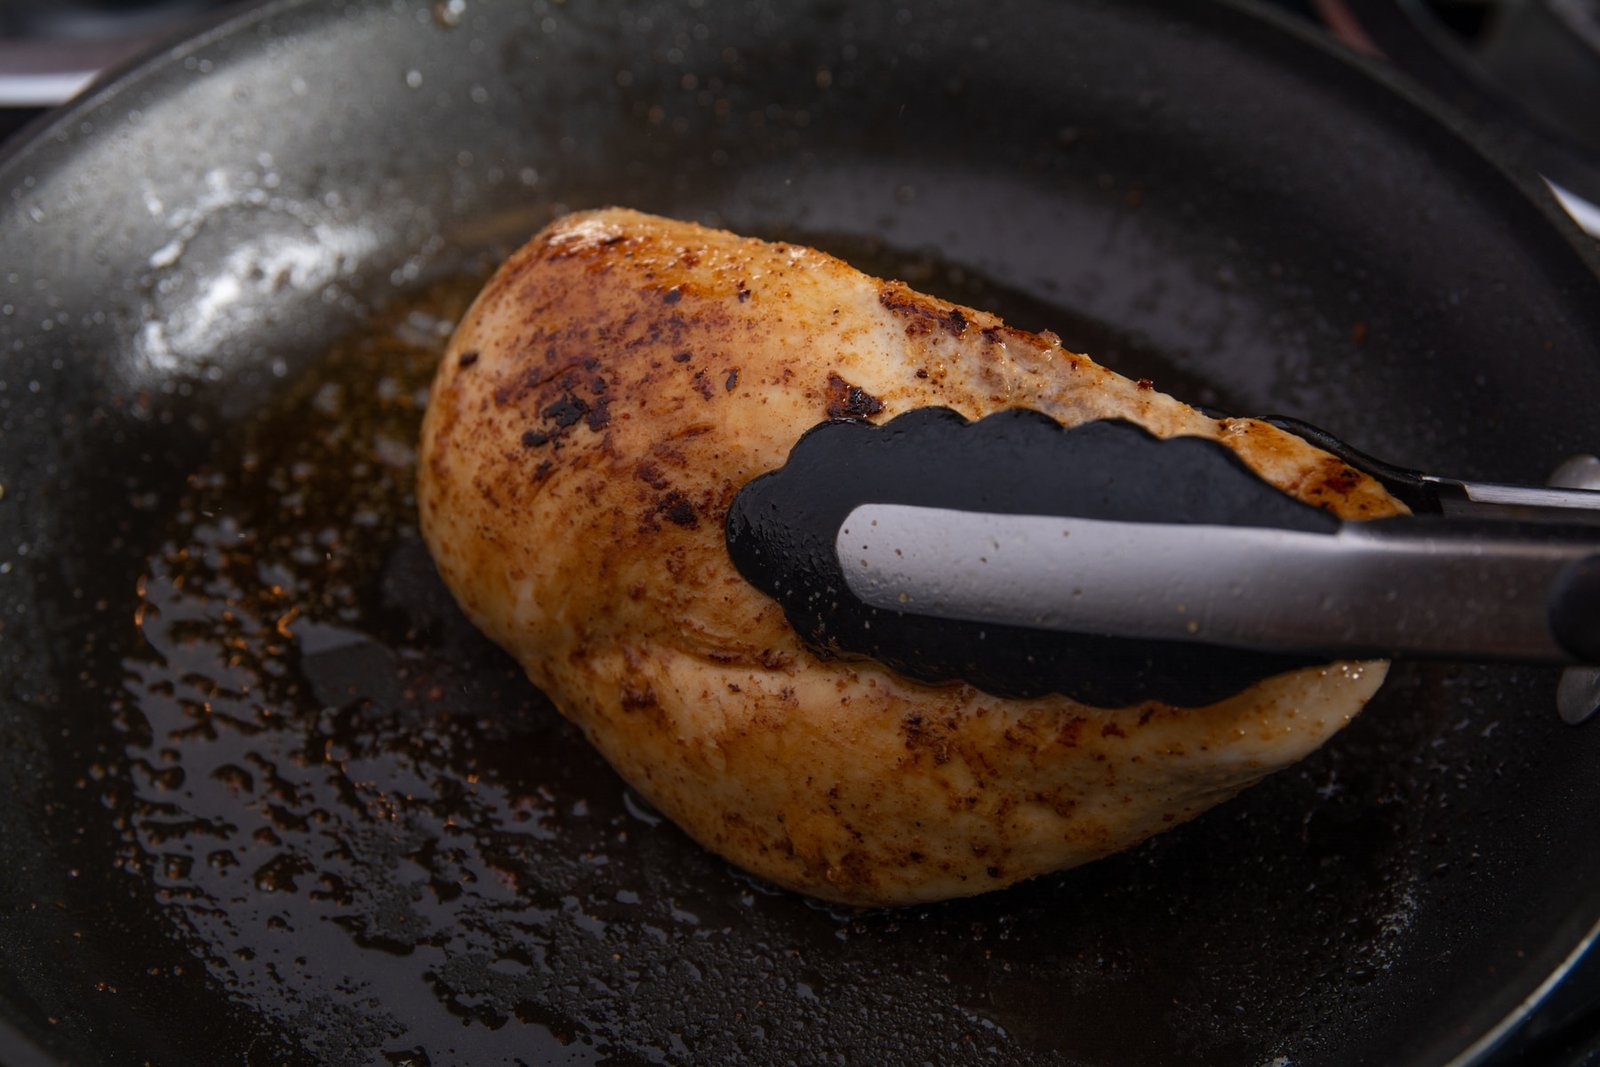
Use some tongs to brown the edges. The total searing time should be less than three minutes. The quicker you can sear the chicken, the juicier it will be. Remember, the chicken is already cooked. It is now ready to serve.
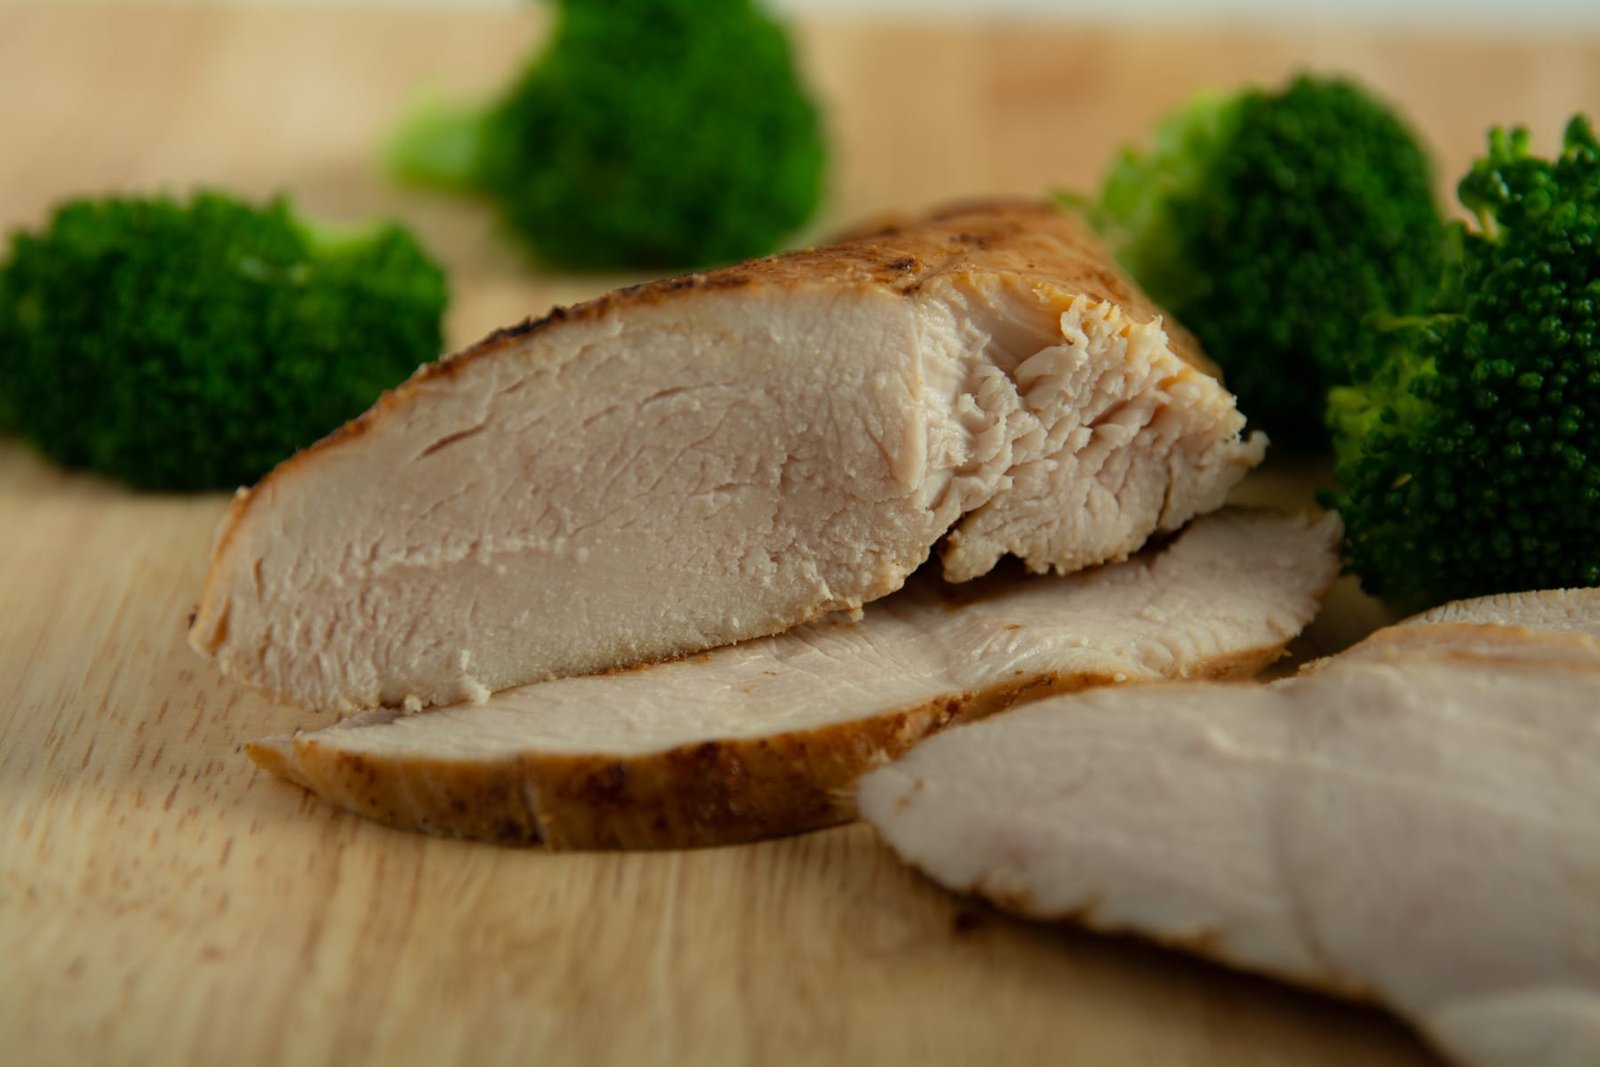
You can see that the center of the chicken has a very faint pink color to it.
If you enjoyed this recipe, you might also like the following sous vide recipes:

Ingredients
- 10 oz Chicken breast Boneless and skinless
- 1 pinch Salt
- 1/16 teaspoon Chili powder
- 1/16 teaspoon Garlic powder
- 1 Tablespoon Oil
Instructions
- Place the chicken breast into a bag. Slowly put the bag into container of water up to the seal. Zip the bag shut. Attach bag to the side of the side of the container.

- Turn on the sous vide device and heat water to 147F. Sous vide for 1 hour and 15 minutes. If the breast is thicker than 1 inch it should cook longer.
- Remove the bag from the container and place into a bowl of ice water.
- After the chicken has chilled remove from the bag and pat dry. Add 1/2 teaspoon of oil and rub onto the breast. Season both sides of the breast.
- Heat pan on medium high heat and add oil to the pan. When the oil just starts to smoke had the seasoned chicken breast. Cook until the breast get some color and flip over. When the breast has color on all sides remove from the pan and serve.
