Looking to wow your loved ones with a pizza that’s oozing with cheese and boasting the perfect crust? Look no further than bread machine pizza dough. It’s a breeze to whip up and promises a mouthwatering, crispy result.
Now, I’ve got to confess, that pizza holds a special place in my heart. It’s the one dish you can customize to your heart’s content – load it up with your favorite meats or go all out with a vegan masterpiece. The options are endless.
Today, we’re diving into the realm of tomato and mushroom pizzas, creating one with a generous helping of cheese and another in its vegan glory. By opting for the vegan version, you can shave off a good 400 calories while still savoring the deliciousness.
Let’s be crystal clear – I’m not making any claims about this being authentic Italian pizza dough. But mark my words, once the world returns to normal, a culinary adventure in Naples is on my bucket list!
Demystifying Pizza Dough
Pizza dough may sound simple, but it’s the canvas for a world of culinary creations. Whether you like a thin, crisp crust or a chewy, substantial one, the crust sets the tone for your pizza. Let’s explore the art of pizza dough!
At its heart, pizza dough is a mix of white flour, salt, water, and yeast. The key is in the details. Do you crave a paper-thin, crispy crust, or perhaps something more substantial and chewy? The magic happens when you experiment with the flour-to-water ratio, salt levels, and even the type of flour. In this recipe, we’re rolling with a 60% hydration level and 1% salt for that perfect balance.
And guess what? Most pizza dough recipes, including this one, are vegan-friendly.
Our bread machine pizza dough recipe results in a pizza that’s soft and airy on the inside, with a delightful chewiness on the outside. But here’s the fun part – if you’re yearning for a different type of crust, don’t hesitate to drop us a comment. We’re all about experimenting and helping you create your very own go-to pizza dough.
You can start with our recipe, give it a whirl, and then tweak it to match your taste buds. Remember, perfection often requires a bit of trial and error, but the beauty of it all is that you’ll be savoring plenty of pizza topped with your favorites along the way. So, what are you waiting for? Let’s get that dough mixing! 🍕
Perfecting Your Pizza Dough
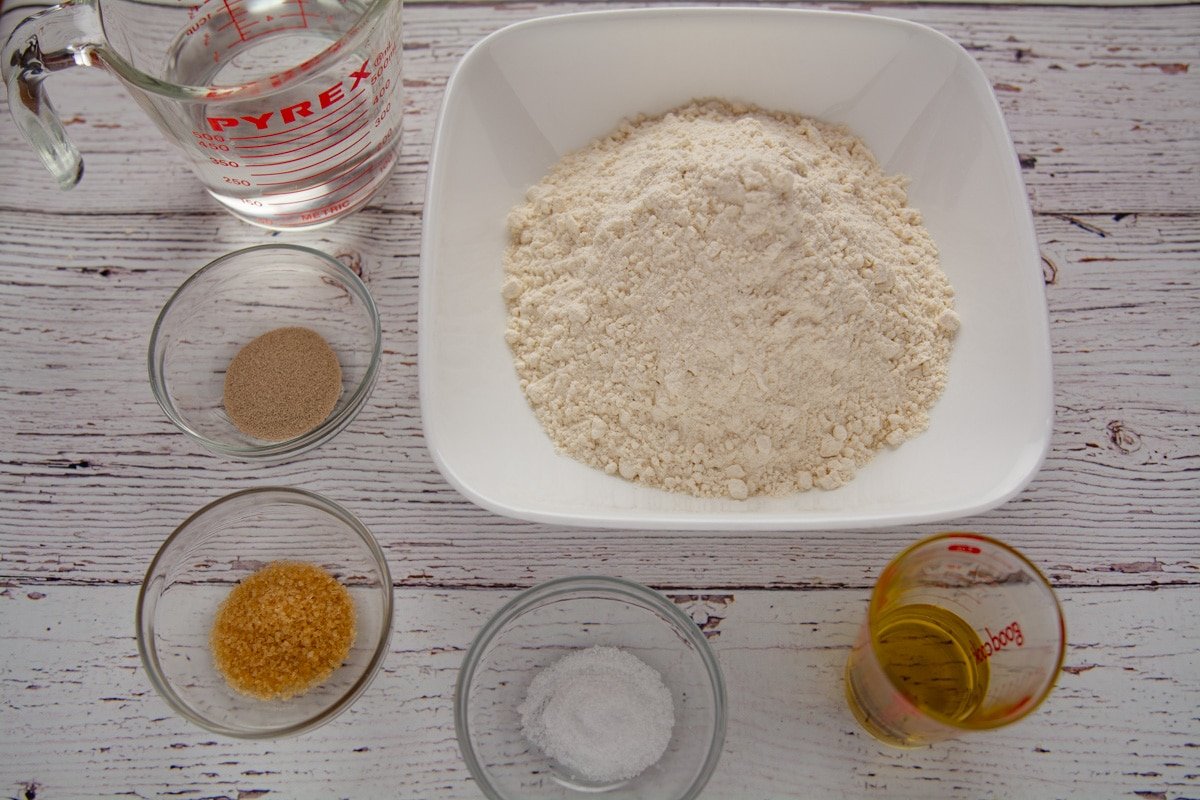
Hey there, fellow pizza enthusiast! When it comes to creating your pizza masterpiece, precision can make all the difference. I’m all about weighing my ingredients for that perfect pie, but don’t fret if you prefer volume measurements – just be ready to make a slight water adjustment.
Pizza Dough Ingredients
Flour: For me, the ideal pizza crust strikes that sweet balance between chewiness and a light, fluffy interior. That’s why I turn to King Arthur bread flour. It’s the superstar that delivers that fantastic chew while supporting those little pockets of deliciousness.
But hey, if all-purpose flour is what’s stocked in your pantry, don’t worry; this recipe can still work its magic. The key is to use what you have on hand. No need to chase fancy flours, though some hardcore pizza purists swear by Tipo 00 – a finely milled flour that promises a delightful chew, even on thin-crust creations.
Feeling adventurous with whole wheat flour? Go for it, but remember, it plays by slightly different hydration rules. Adjust the water in your recipe accordingly, and you’re on your way to a whole-wheat pizza adventure.
Water’s role in pizza dough is all about achieving the right balance. Too little, and your dough will be dry and tough. Too much, and you’ll have a sticky mess on your hands. The magic lies in getting that hydration level just right.
Salt: The ideal salt-to-flour ratio typically hovers around 1-2%. That’s about 10-20 grams of salt for every 1,000 grams of flour. Adjust it to your taste, but remember, less is often more when it comes to salt.
Sugar is yeast’s best friend. It provides a quick and easily digestible source of food for the yeast, helping your dough rise and develop those desirable air pockets that make your crust light and airy. This can be particularly useful in speeding up the rising process. Sugar also contributes to the browning of your pizza crust during baking. It gives that enticing golden hue and a hint of sweetness to the outer layer.
Oil: Oil’s primary role in pizza dough is to add moisture and enhance tenderness. It creates a soft, supple texture that makes your pizza crust enjoyable to chew. A little oil can go a long way in making your dough more forgiving and less prone to becoming tough.
Yeast: Yeast isn’t just about texture; it’s also about taste. During fermentation, yeast produces a range of flavor compounds that contribute to the delicious complexity of your dough. This is what makes a well-risen pizza crust so much more than just a vessel for toppings.
Mastering Pizza Dough with Your Bread Machine
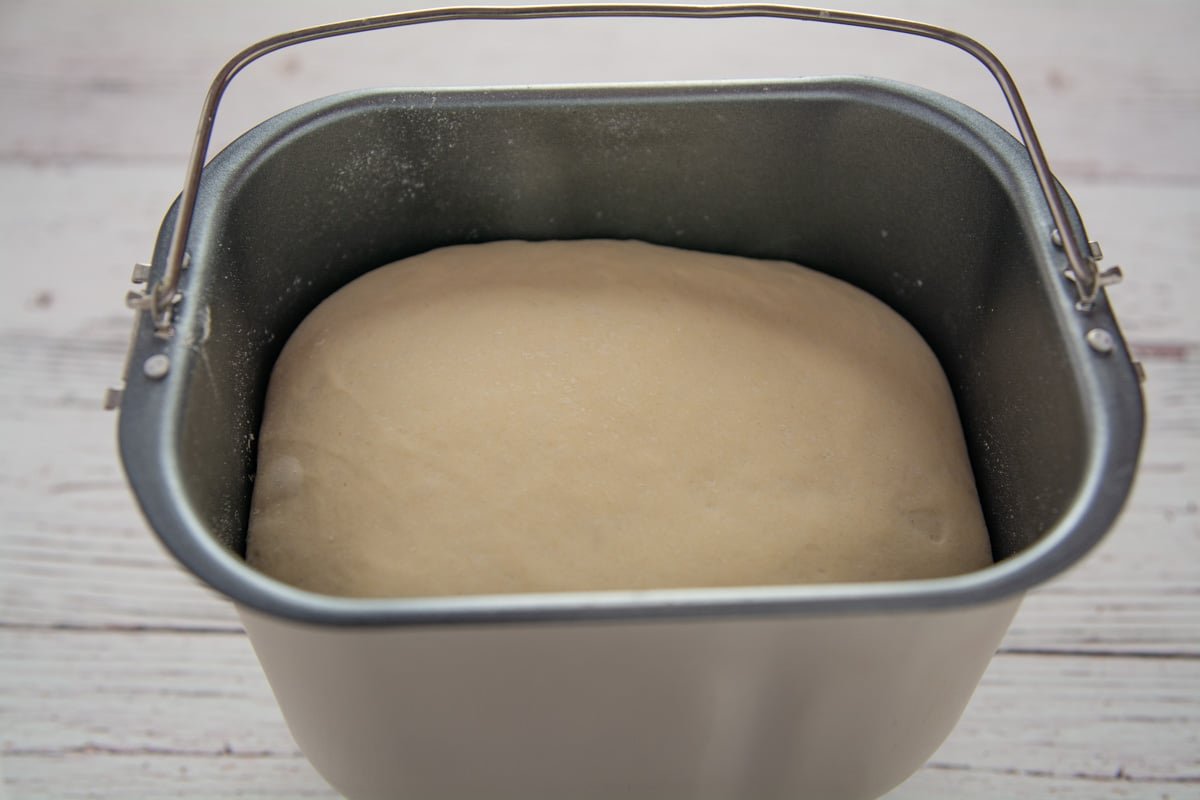
Creating the perfect pizza dough with your trusty bread machine is easier than you might think. Let’s break it down step by step.
Ingredients into the Machine
Start by placing your ingredients into the bread machine. The order I follow is somewhat in line with what my bread machine manufacturer suggests: water, sugar, salt, oil, flour, and lastly, yeast.
Choosing the Right Settings
Select the “dough” and “two-pound loaf” settings on your bread machine. This is the sweet spot for pizza dough preparation.
As your bread machine kicks into action and begins kneading the dough, keep an eye on those corners. Make sure there’s no dry flour left behind. If you spot any, pause the machine and gently scrape it into the dough ball.
Divide and Rest
Once your bread machine has completed the dough cycle, remove the dough and place it on a lightly floured surface. Divide it into two balls and let them rest for a few minutes. Two balls will give you ten to twelve-inch pizzas. If you’re leaning toward personal-sized pizzas, divide the dough into four balls.
For Extra Flavor: Ferment the Dough
For an extra flavor boost (highly recommended!), here’s a pro tip. After the machine finishes kneading and starts the rise portion, stop the machine. Remove the dough, divide it into two balls, and coat two large bowls with oil. Place the dough balls inside, giving them a nice oil bath. Cover the bowls and pop them into the refrigerator for up to four days. About two hours before you’re ready to cook, take the dough out of the fridge and let it warm up before shaping it into a pizza crust.
Machine Matters
I personally use a Cuisinart CBK-200 Convection Bread Maker and it’s been a delight. However, your machine might have different settings, so feel free to adjust accordingly. You don’t need all the fancy bells and whistles for making dough.
Budget-Friendly Tips
If you’re watching your budget or just love a good deal (like me), keep an eye on your local thrift stores. Reddit and similar platforms often showcase bread machines in nearly-new condition for less than five dollars. While they might not have all the bells and whistles, they’re perfect for creating your pizza dough.
So there you have it – a simple, efficient way to whip up fantastic pizza dough with your bread machine. Get ready to impress your taste buds and your friends with your homemade pizza creations!
Shaping Your Pizza Dough: Let’s Get Creative!
So, you’ve let your dough balls do their thing for about five minutes or so, and now it’s time to shape them into the perfect pizza crust. Let’s dive into this fun part!
The Stretching Phase
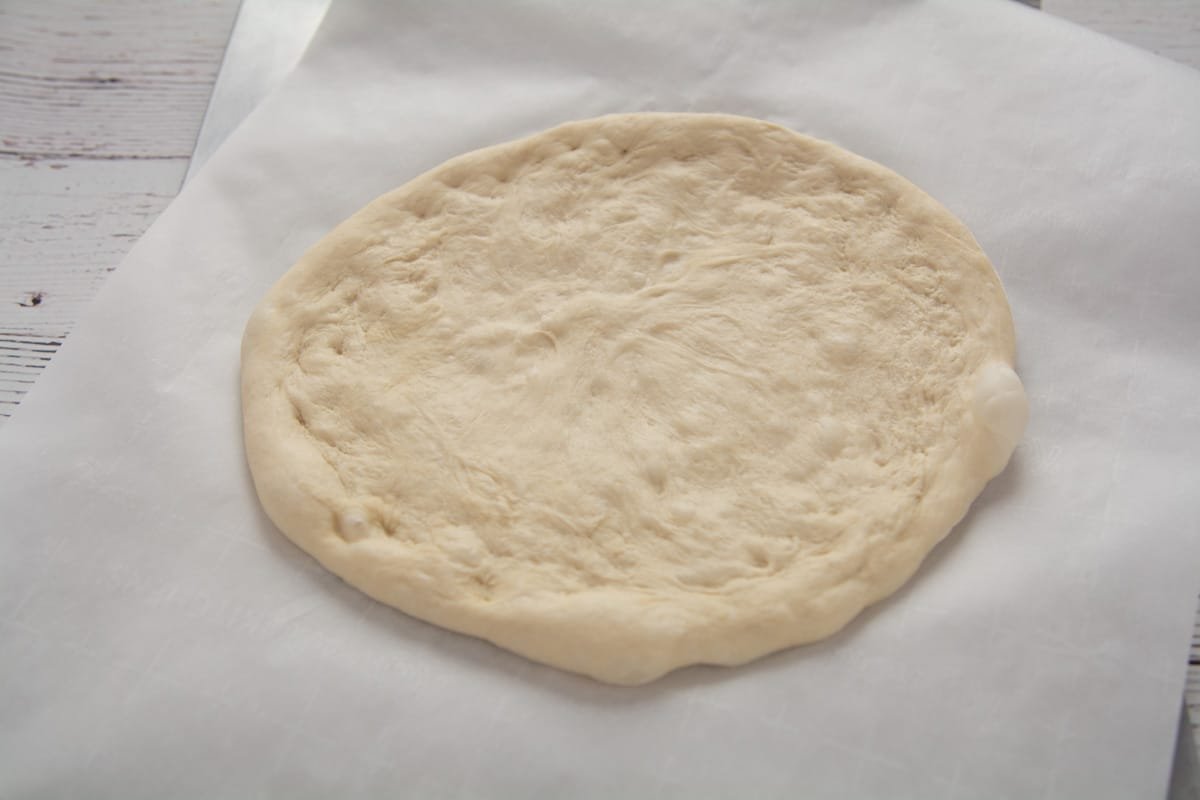
On a lightly floured surface, gently start stretching out your dough. The goal here is to achieve that ideal shape without it snapping back. If it’s feeling a bit stubborn, let it rest a little longer. And here’s a pro tip: try to leave a nice lip around the edge for that perfect crust.
Parchment Paper Perk
Once your dough is just the way you want it, place it on parchment paper. This little trick makes moving and transferring your pizza into a scorching hot oven a breeze. The best part? Parchment paper won’t stick to your pizza peel, eliminating the need for cornmeal. No more worries about cornmeal burning and creating unwanted smoke on your hot stone or baking steel.
Hands-on Artistry
While we’re shaping our pizza dough, resist the urge to grab a rolling pin. Let’s keep it rustic and hands-on. And if you spot air pockets, embrace them! They’re like little flavor surprises, especially the ones around the rim – my personal favorite.
Tears and Imperfections
Don’t sweat it if your dough gets a tear here and there. It happens to the best of us. Just roll the dough over the hole and pinch it back together. In fact, the more character, the better – pizza with personality!
Layering the Love
Now it’s time to bring your pizza to life with your favorite toppings. Start with the sauce, then sprinkle on the cheese, and get creative with the toppings that match your mood.
Keep in mind that your pizza will cook quickly, so if you’re adding raw veggies, slice them thinly. Anything thick or juicy, like raw meat, should be pre-cooked for that perfect finish.
Extra Flair for the Edge
For an extra pop of flavor and color, drizzle a bit of olive oil onto the edge of your pizza crust. Then, sprinkle it with granulated garlic or garlic powder – it’s a little touch that goes a long way.
The Final Rise
Before you slide your pizza into the oven, allow it to rise for 5 to 15 minutes with all those delicious toppings. This little extra time enhances the flavor and texture, making each bite even more enjoyable.
So, you’ve nailed the art of shaping your pizza dough, and now it’s time for the grand finale – baking your masterpiece. Get ready to savor the results of your creative culinary journey!
Crafting Pizza Dough Without a Bread Machine
No bread machine? No worries! You can still create fantastic pizza dough; it just means a bit more hands-on fun.
Begin by adding a pinch of sugar to your water, along with the yeast. While your yeast gets foamy, measure out your other dough ingredients and combine them in a large mixing bowl. A silicone or wooden spoon does the job well. Once your yeast is ready, add it to the bowl and mix everything together.
Gently knead the dough for a few minutes. Cover your bowl with plastic and let the dough rest for 5-10 minutes. If the dough starts feeling a bit stiff, cover it and give it a 10-minute rest. After this, continue kneading.
Divide the dough into two balls, then knead each one for a few minutes. Place them in separate bowls that have been coated with olive oil. Ensure the tops of the dough balls are also oiled. Cover the bowls and let the dough rise.
Using a Stand Mixer
If you have a stand mixer, add the ingredients and attach the dough hook. Mix on low speed until the dough comes together. Form the dough into a ball, turn off the mixer, and cover it with a towel. Let the dough rest for ten minutes.
After the dough has rested, turn on the mixer and knead on low to medium speed for about five minutes. Then, turn off the mixer, divide the dough into two balls, and place them in oiled bowls. Cover the bowls and let the dough rise.
Allow your pizza dough balls to double in size. The time needed for rising can vary depending on the room temperature. Once they’ve doubled, they’re ready to be shaped into pizza crusts. Alternatively, you can store them in the refrigerator for up to four days.
Food Processor Adventures
Some pizza enthusiasts swear by making their dough in a food processor. While I haven’t tried it yet, it’s on my pizza-making bucket list. Stay tuned for more tips when I embark on my food processor dough-making adventure.
No matter which method you choose, creating your pizza dough from scratch is a rewarding journey, and the taste is unbeatable. Get ready to craft your perfect pizza!
Elevate Your Pizza Game with a Pizza Stone or Steel Plate
So, why are pizza stones and steel plates the go-to choice for pizza aficionados? Well, you can certainly use a baking sheet in a pinch, but if you’re aiming for the perfect pizza experience, here’s why you might want to consider these alternatives.
Pizza stones and steel plates are heavyweight champions in the world of pizza making. They boast impressive heat-retaining capabilities, which means they can take your pizza to a whole new level.
When you open that oven door, the temperature naturally drops a bit. But here’s where the magic happens: pizza stones and steel plates hold onto that heat, ensuring a rapid transfer of it to your pizza crust. This quick and intense burst of heat is what bakers affectionately call “oven spring.”
Baking your pizza on these surfaces ensures that the bottom crust gets that coveted chewiness, while the inside remains light and tender. It’s the perfect combination for a slice that’s crisp on the outside and pillowy on the inside.
Steel vs. Stone
While both stone and steel work wonders, some prefer the durability and better heat transfer of steel plates. The thicker, the better. Many pizza aficionados swear by steel plates, and the good news is they’re quite resilient – rarely breaking or cracking.
Before getting started, preheat your oven with the stone or steel plate inside. We like to crank ours up to 550°F (287°C). If your oven doesn’t go that high, set it to the maximum temperature. Hold this heat for at least fifteen minutes before introducing your pizza. This ensures everything is completely heat-soaked and ready for action.
The optimal placement of your stone or steel plate is in the bottom third of the oven. Not the very bottom rack, but the one just above it. We’ve found that this rack position results in perfectly melted cheese and a crust with just the right amount of char. Depending on your oven, you may want to experiment to find the ideal rack for your pizza perfection.
Taking care of your pizza stone or steel plate is essential. For a pizza stone, never toss it in the dishwasher. If it gets wet, ensure it’s thoroughly dry before reheating it in the oven to avoid any cracking. After use, simply scrape off any cheese and brush away crumbs. Oil stains? Don’t worry about those.
As for a steel plate, after using it, give it a wash, then pop it back into the oven to dry. A light coat of oil applied with a paper towel can keep rust at bay. You can even leave it in the oven when cooking other things – it’s pretty low-maintenance.
So, whether you opt for stone or steel, these trusty tools are your ticket to pizza perfection. Get ready to take your homemade pizza to a whole new level of deliciousness!
Pan pizza version
So, you’re craving a pan-style pizza – the kind that’s fluffy, thick, and utterly delicious. You’re in for a treat, and you won’t even need parchment paper for this one.
To make this pan pizza, start by preparing your dough using the same trusty recipe and give it the time it needs to rise. Now, let’s get your oven in on the action – preheat it to a toasty 450°F. Pan pizzas are a bit thicker, so they require a tad more time in the oven, but remember, a hot oven is still the key.
Next up, give your pizza pan a generous drizzle of oil. If you’re feeling extra adventurous, add a sprinkle of garlic powder for an extra burst of flavor. Place your dough right on that beautifully oiled pan, and start stretching it out until it forms the perfect pizza crust.
It’s time to have some fun. Add your pizza sauce, then pile on your favorite toppings. Get creative – this is your masterpiece, after all.
Now, pop your pizza into that preheated oven and keep a close watch. The magic happens when your pan pizza reaches your desired level of doneness. Some of us love a well-done pizza, while others prefer it lightly cooked – the choice is yours!
Get ready for a pan-style pizza experience that’ll make your taste buds dance. It’s pizza night done right!
Storing and Freezing Pizza Dough – A Slice of Convenience
Planning ahead or saving dough for later? Here’s your guide to storing and freezing pizza dough, so you can enjoy fresh, homemade pizza whenever you please!
If you’re thinking ahead and want to savor the flavor, follow the same trusty recipe. But here’s the twist: when your bread machine wraps up the kneading, turn it off before the rise cycle. This will let your dough take its time, slowly rising and developing those fantastic flavors.
Perks of Storing the Dough:
- Ready on Your Schedule: Your dough is all prepped and ready when you are.
- Flavorful Delight: That slow rise at cooler temps adds layers of flavor.
- Easy to Shape: Your dough becomes a breeze to work with.
- Chewy Goodness: Expect a satisfyingly chewy pizza crust.
Freezing the Dough
For those times when you want to stash some pizza dough for later pizza-making adventures, let the dough complete its first rise. Divide it into portions, then individually wrap each dough ball in plastic wrap. Gather those wrapped dough balls into a large plastic bag, and into the freezer they go.
When you’re ready to give your frozen dough a starring role in a pizza night, here’s the plan. Take a dough ball out of the freezer and let it hang out on the counter. Depending on your room temperature, it’ll be ready to stretch out in about one to two hours.
If you’re looking for a more leisurely defrost, remove the frozen dough ball and let it sit on the counter until you can gently remove the plastic wrap. Transfer the dough to an oiled bowl, cover it up, and let it spend the night in the fridge. About an hour before the pizza-making extravaganza, retrieve your dough and let it reach room temperature. It’s now good to go for your pizza masterpiece!
So, whether you’re storing it in the fridge or freezing it for future pizza bliss, enjoy the flexibility of homemade pizza dough that fits your schedule. Get ready to savor the taste of your delicious creations!
Ready to Shape Your Pizza Dough? Here’s How!
You’re in the pizza-making zone, and it’s time to get your dough ready for the delicious journey ahead. Here’s the scoop on shaping your dough to perfection!
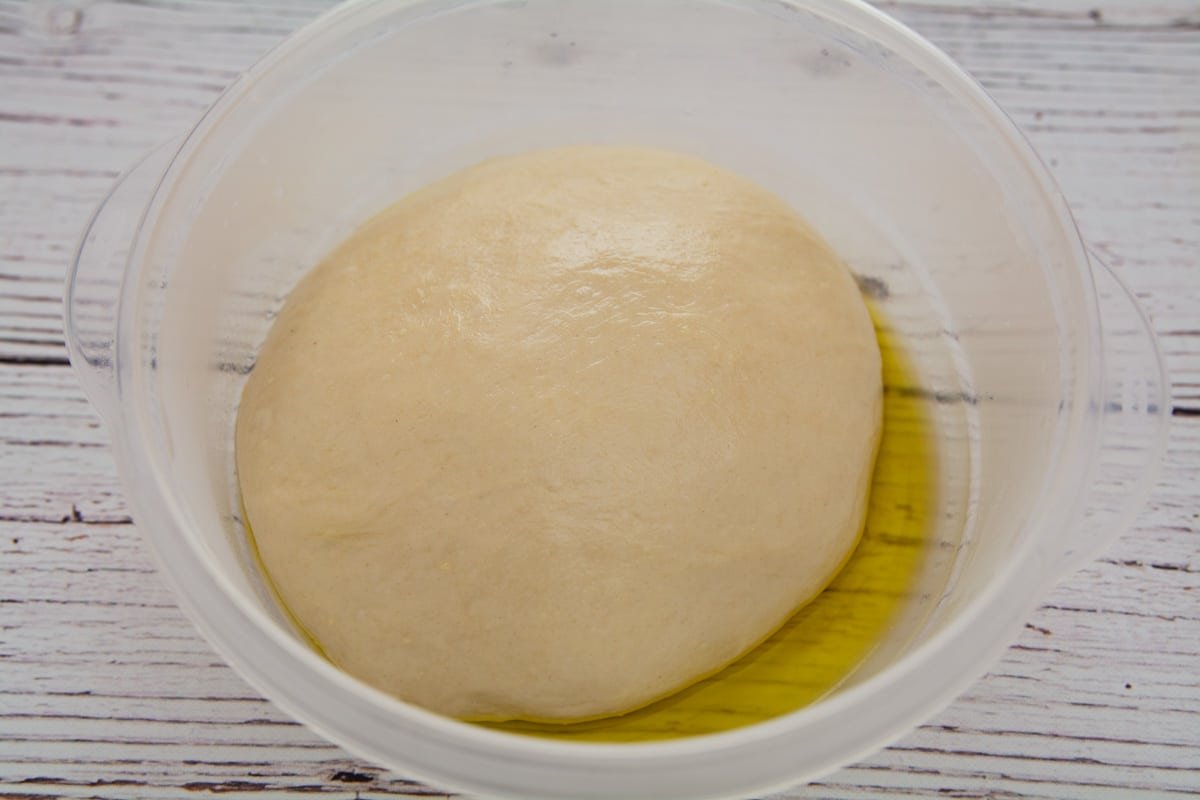
Begin by adding a tablespoon of olive oil to two round bowls. Round bowls are your shaping buddies for later, so they’re a wise choice.
Now, stop that bread machine, and let’s work our magic. Oil up your hands because, at this stage, the dough can be a bit sticky. Divide it into two balls. A little extra oil on your hands will make this process smoother. Coat the top of each dough ball by gently rubbing it into the bowl. Flip it over and place it inside the bowl, then cover it up.
Some folks prefer airtight containers, but here’s a couple of options to consider. There are pizza bowls, which are handy and budget-friendly – they’re simple, round plastic bowls with snap-tight lids. To allow the CO2 produced during fermentation to escape, just punch a tiny hole in the lid. Alternatively, you can use plastic wrap – it lets that CO2 do its thing.
Once your dough balls are cozily nestled in their bowls or plastic bags, let them rise at room temperature for about thirty minutes to an hour. Then, it’s time to chill – pop those dough balls in the fridge. You can keep them in there for up to four days.
Here’s a pro tip: the longer you let your dough ferment, the bolder the flavor. But be careful – after four days, the dough can become a bit too soft for easy handling.
If you’re planning a lengthy, slow ferment in the fridge, consider cutting back on or eliminating the sugar – it can help keep your dough in perfect balance.
With your pizza dough prepped and shaped, you’re one step closer to the pizza of your dreams. Get ready to create something truly delicious!
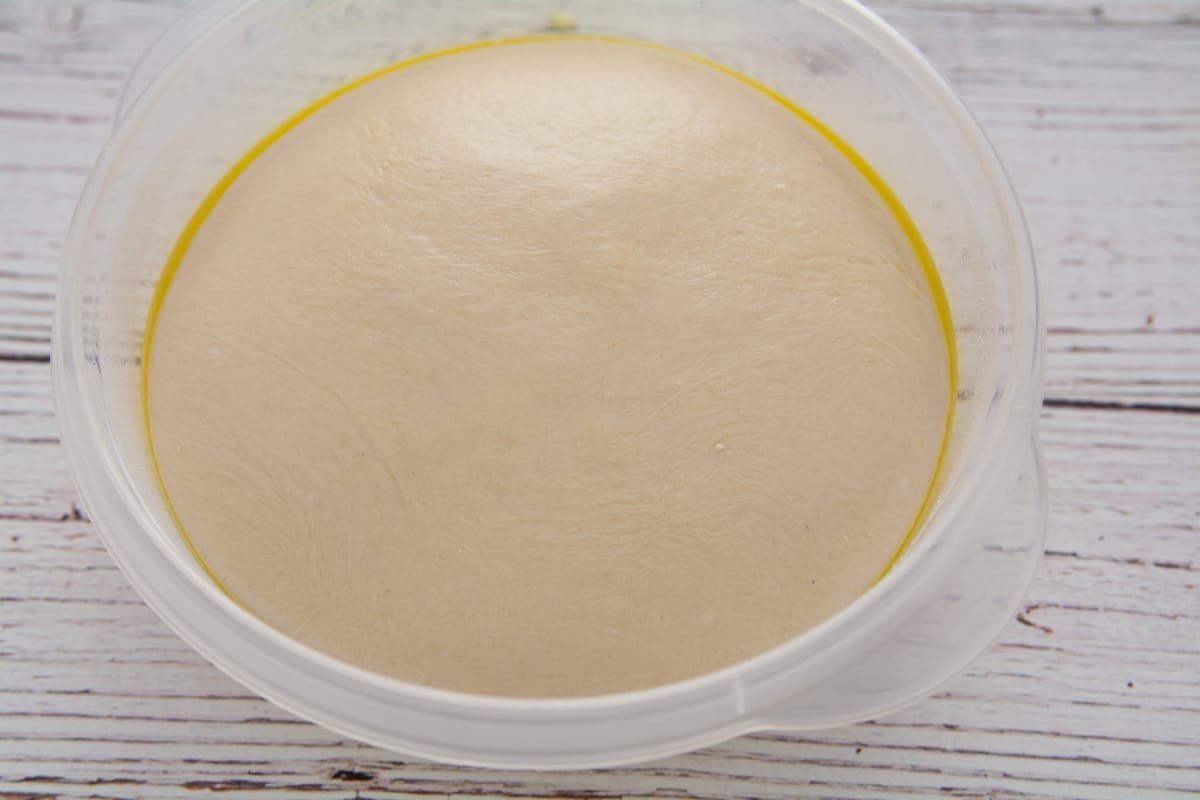
Before you can start shaping your dough into that delicious pizza crust, it needs a little time to warm up. This usually takes me just a bit over an hour. It’s like giving your dough a little cozy time to relax and get in the pizza-making mood.
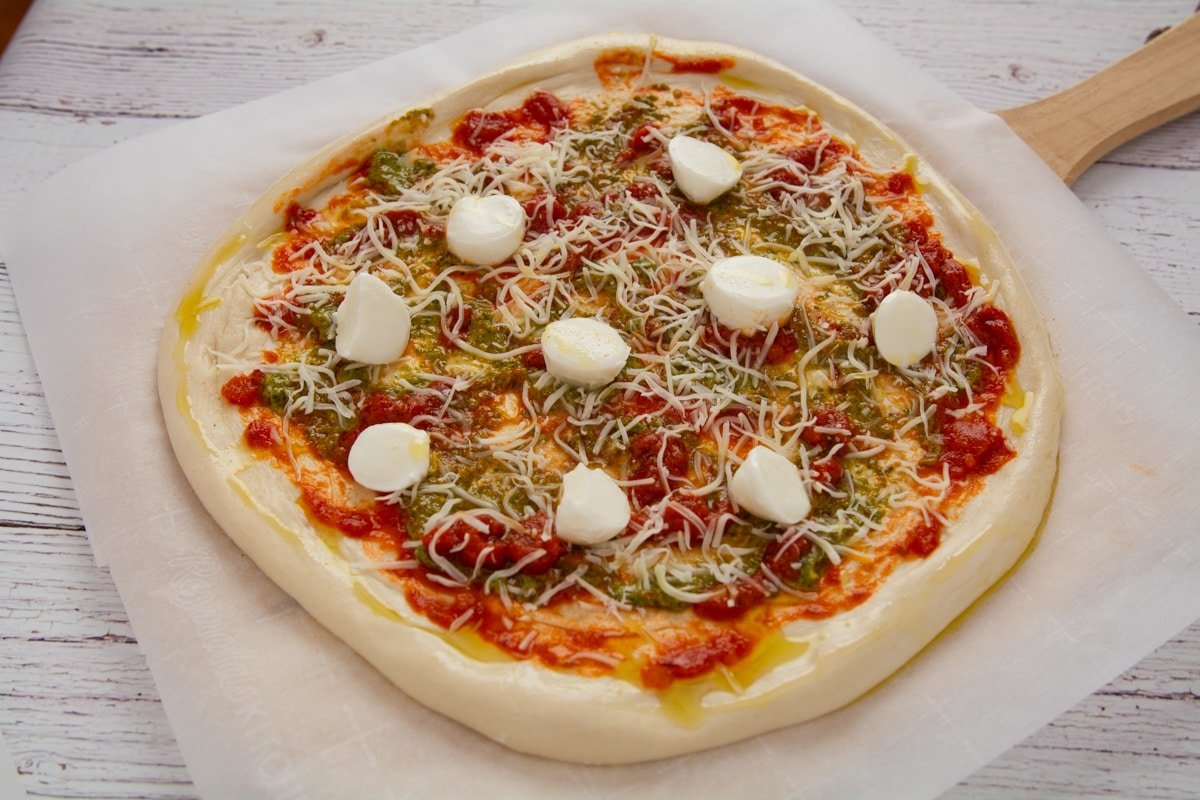
Let’s Talk Toppings: Creating Your Pizza Masterpiece!
Pizza toppings are your playground, and you can get as creative as you’d like – pineapple, anyone? But here are a couple of key things to consider as you build your pizza.
When it comes to ingredients, moisture and cooking time are the two main players. If you’re using ingredients like mushrooms, slice them thinly or consider giving them a quick pre-cook. Mozzarella can be a bit of a water-releasing superstar, so keep that in mind.
The order in which you layer your ingredients can work wonders for the texture and appearance of your pizza. For a delightful twist, I like to put pepperoni on top. This way, it gets all crispy, and those edges curl up just perfectly.
Now, after you’ve shaped that fantastic pizza crust, place it on some trusty parchment paper. Time to get creative with your favorite toppings. For this pizza, we went with marinara sauce, pesto, mozzarella, fresh buffalo mozzarella, and a drizzle of olive oil – it’s like a flavor symphony!
Before your pizza ventures into the oven, let it rest for about five to ten minutes. This brief breather ensures that all those delicious flavors get to know each other and that your pizza is perfectly prepared to delight your taste buds.
Now, with your toppings in place and a well-rested pizza, you’re ready to create a culinary masterpiece. Get ready for a pizza that’s as visually stunning as it is mouthwateringly delicious!

After six minutes at 550F on a steel plate, the pizza looked like this.

Your oven is preheated, your pizza is beautifully topped, and it’s had a moment to rise and get all cozy. Now, it’s time for the real pizza magic – cooking time!
First things first, open that oven door and quickly slide your pizza – parchment paper and all – onto the hot surface of your stone or steel. It’s like sending your pizza into the enchanted chamber of deliciousness. Close the oven door and get ready to witness the magic unfold.
In less than a minute, you’ll start to see that dough work its magic as it begins to rise. It’s like a tasty, puffy cloud forming right before your eyes.
Now, here’s where your oven’s personality comes into play. In my trusty oven, the baking time is a swift seven minutes. But, let’s be real, every oven is unique. So, it’s crucial to keep a close eye on your pizza while it’s cooking. You’ll know it’s ready when it reaches that perfect level of deliciousness.
Get ready to enjoy the symphony of sights and smells as your pizza transforms into a work of art. It’s a delicious journey, and it’s all happening right in your oven!
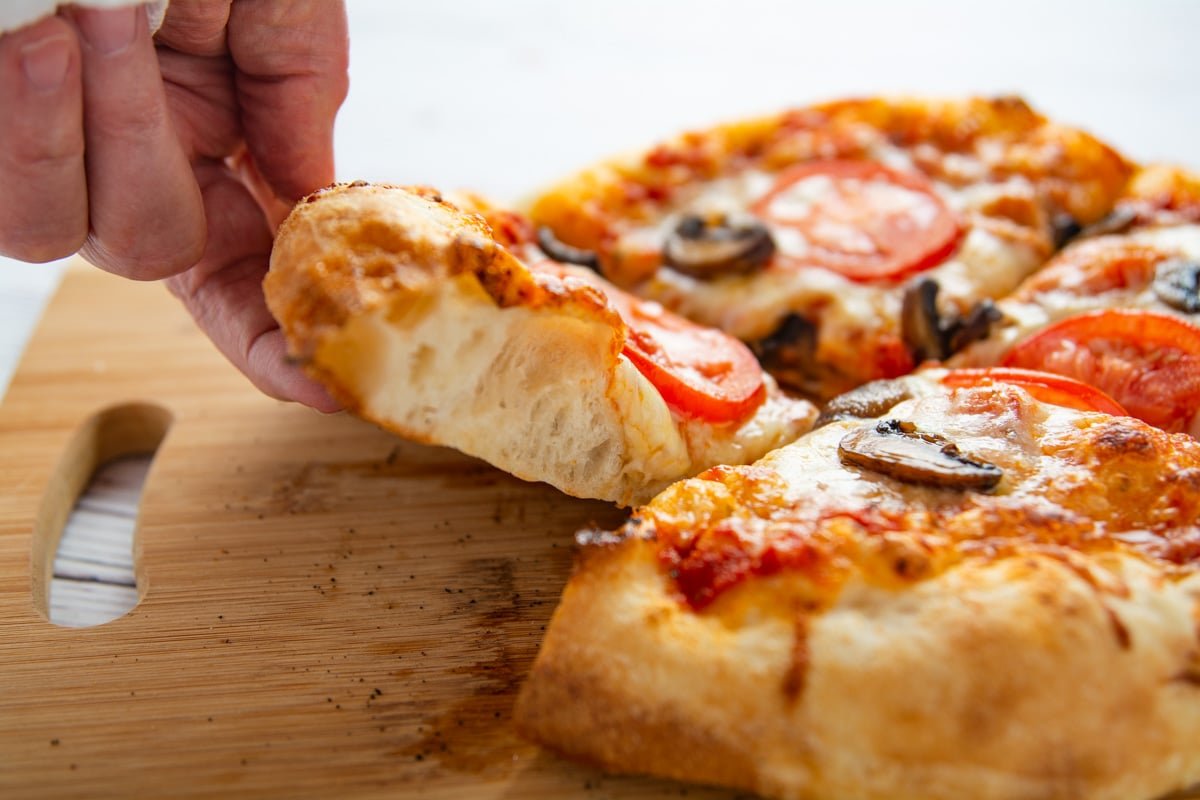
Your pizza has just emerged from the oven, and it’s tempting to dive right in, but here’s a little secret to pizza perfection – give it a little time to cool.
Place your piping hot pizza on a trusty wire rack and let it cool for about five minutes. It’s like a moment of zen for your pizza, and here’s why it matters.
This short cooling break allows the cheese and sauce to work their magic. They’ll thicken back up and hold everything together. In essence, it’s like giving your pizza a chance to “settle” after its hot adventure in the oven.
Cutting your pizza right out of the oven can lead to a bit of a cheesy, saucy mess. But we get it – waiting is the toughest part. That delicious aroma and those tempting slices make it a true challenge.
So, practice the art of patience, take a deep breath, and give it those few precious minutes. Your pizza will thank you, and your pizza experience will be all the better for it!

It’s almost impossible to get crust like that without a stone or steel plate.
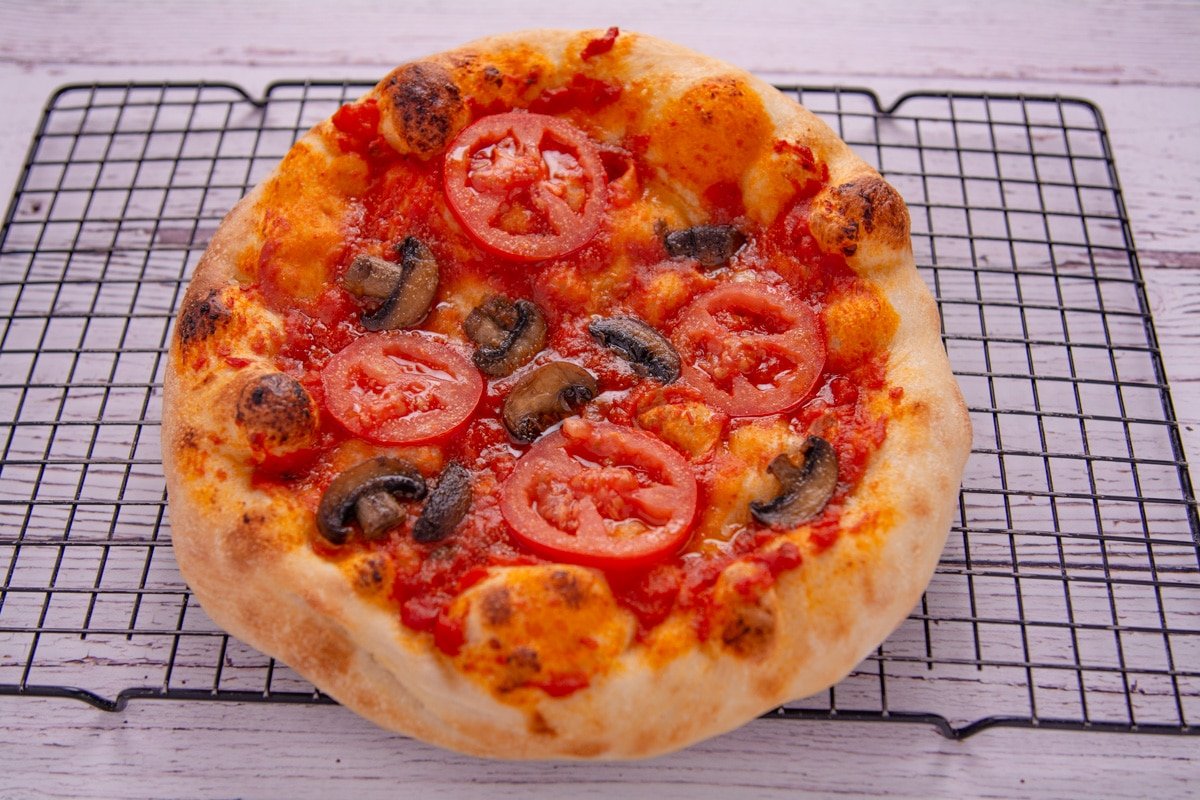
This is our dairy-free / vegan pizza fresh from the oven.
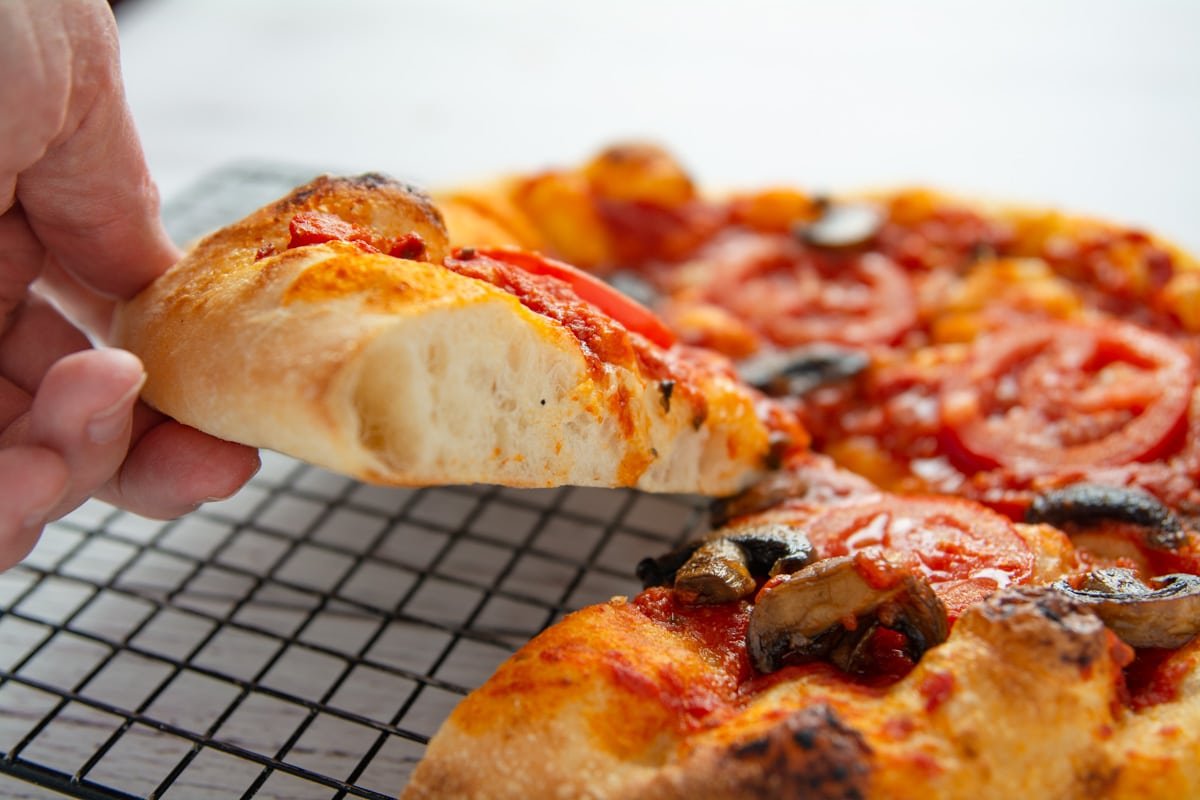
Still lots of nice air pockets.
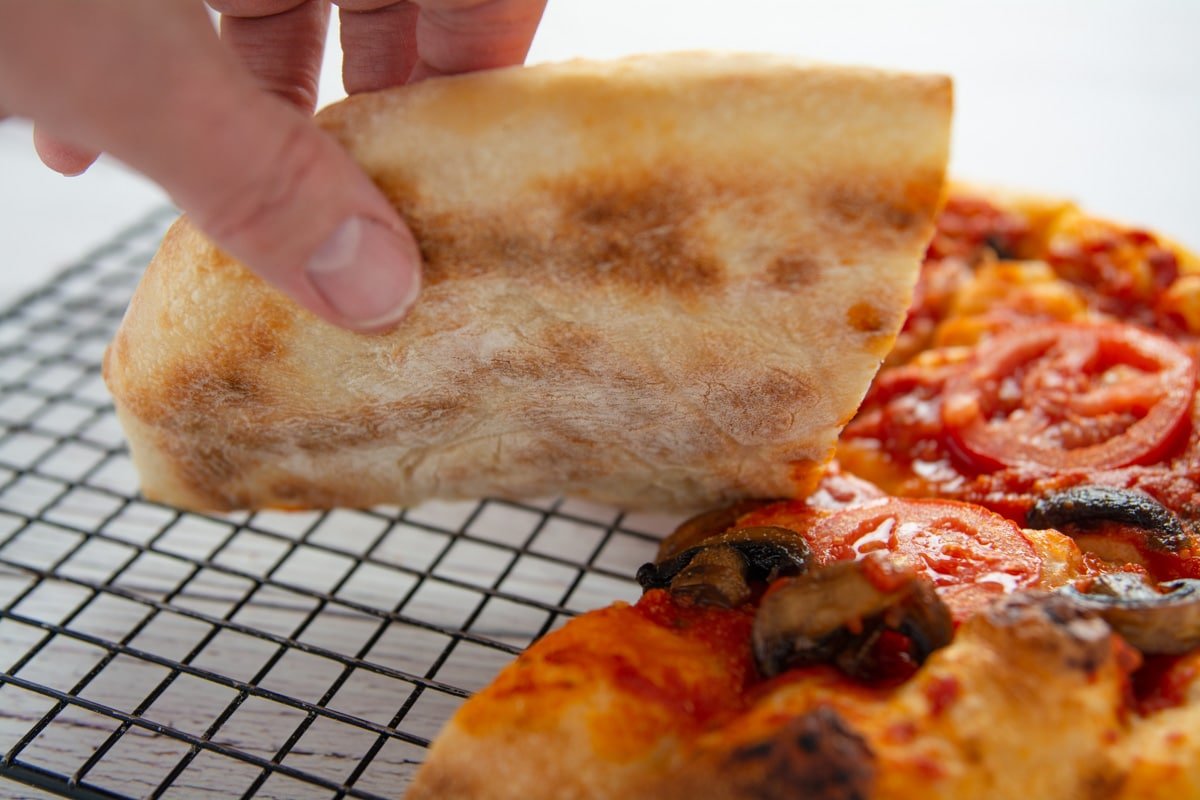
I should have given it a few more seconds in the oven but it was still good.
Pizza Dough Troubleshooting: A Slice of Wisdom
Encountered some pizza dough hiccups? No worries, we’ve got the solutions to help you master your pizza-making adventure!
1. Dough Not Rising? Blame the Yeast
If your dough isn’t rising to the occasion, the yeast might be the culprit. Check that expiration date – old yeast can be a mood spoiler. To test your yeast’s vitality, mix a small amount with room temperature water and a pinch of sugar in a glass. If, after ten minutes, it’s not bubbling away, you’ve got dead yeast on your hands. Time for fresh yeast, which you should store in the refrigerator.
2. Chilly Room? Slow Rise
If your pizza dough seems in no hurry to rise, check the room temperature. Cold environments can slow things down, but don’t worry – the dough will get there; it might just take a day or two.
3. Lackluster Taste? Need More Salt
If your pizza dough is a bit bland, consider adding more salt. This recipe calls for 1% salt by weight, but many pizza places opt for around 1.5% salt to amp up the flavor.
4. Sticky Situation? It’s the Gluten
Sticky dough isn’t a disaster – it’s all about gluten formation and hydration levels. As the flour works, gluten forms and can make things a tad sticky. No problem! If your dough feels overly sticky when you’re ready to shape it, knead in a little flour. Add a bit at a time until it’s manageable.
5. Stubborn Dough? Let It Rest
If your dough is a bit stiff or just won’t cooperate during kneading or stretching, don’t fret. Cover it up with a towel and let it take a breather for ten to fifteen minutes. Then come back and try again. You might need to do this a few times until your dough is in the perfect stretchy state.
6. Runny Sauce? Too Much Liquid
Is your sauce behaving like a waterfall? That’s a no-go. Pizza sauce should be thick. If you’re using homemade marinara, cook it until it thickens before using it for pizza. For veggies that love to release excess moisture, give them a quick pre-cook. Fresh mozzarella cheese is a moisture maven too, so be ready for a little extra liquid while it cooks.
And there you have it! Troubleshooting your homemade pizza dough to make your pizza nights as stress-free as possible. After all, it’s just pizza, and it’s meant to be enjoyed with friends and family. Bon appétit!
My video on YouTube does have a few more tips in it.
If you are looking for more pizza dough inspiration this is a link to my no-knead pizza dough recipe. https://jamesstrange.com/no-knead-pizza-dough-same-day/

If your looking for something sweet but super easy then check out Sister Schubert’s Cinnamon Roll Pull Apart Bread.

Ingredients
Dough
- 300 grams Water 1 1/4 Cups
- 5 grams Sugar 1 teaspoon
- 5 grams Salt 3/4 teaspoon / fine sea salt
- 35 Milliliters Olive oil 2 Tablespoons
- 500 grams Bread flour 4 Cups
- 3 grams Instant yeast 1 teaspoon
Toppings
- 1/2 Cup Marinara Sauce
- 1 Roma Tomato
- 2 oz Mushrooms
- 7 oz Cheese Optional / Leave off for vegan
- 1/4 teaspoon Dried oregano
- 2 teaspoons Olive oil Optional (makes the crust crunchy)
- 1/8 teaspoon Granulated garlic
Other
- 2 Tablespoons Flour For dusting
Instructions
Make the dough
- Add all of the dough ingredients to your bread machine in the order listed.
- Set your bread machine to the dough setting, and if it has a loaf size, set it to 2 pounds and turn it on.
- After the bread machine starts to knead the dough, confirm that the corners do not have dry flour. If needed, pause the machine and scrape the dry flour into the dough ball.
- After the machine has completed the dough cycle, remove the dough to a lightly floured surface and divide it into 2 balls.
- Gently press the dough balls into 2 round 10 to 12-inch pizza crust. Pinch together any tears in the dough.
Preheat the oven
- Place your pizza stone or steel plate in the oven
- Preheat your oven to 550F or 287C
Prepare the toppings
- Cut up the veggies you want to use; thin cuts are better.
- Precook larger or hard veggies and or meats.
Pizza toppings
- Add your pizza toppings. I add the sauce first, then cheese then I add my other toppings.
- Let the dough rise for 5 to 15 minutes
Cook
- Place your pizza on the preheat stone or steel and cook until the desired doneness. In my oven, it takes 7 minutes.
- Remove from the oven and let rest for 5 minutes.
- Cut and serve

This was so weird. I saw your video link on the Bing search engine concerning Pizza Dough and then I watched it on youtube and followed another link to your site where I was shocked to see my name in large block letters. I’m a James Strange too.
That’s cool
Love your recipes
Thank you
Your video says to use instant dry \yeast, yet your recipe says active dry yeast. Why?
Thanks for the question. I have updated it to show Instant yeast. Since this is a bread machine recipe you need a fast-acting yeast that does not require hydrating beforehand.
With “regular” pizza dough recipes, vs. machine, you should be able to get 3-283g balls of dough from this recipe, making 3-12″ pizzas, IF you stretch your dough thinner in the middle leaving an outer edge (cornicione) of thicker dough like most pizzas. Your pizza is very thick all the way across which may be because of using 100% bread flour vs mixing with AP or better yet “00” flours. If you are having trouble stretching the dough, letting it ferment a few hours at room temp after balling up the dough will make a world of difference. Better yet,… Read more »
JJ, thanks for posting the great tips, and sorry I took so long to respond.